A Headless Body Production
Venue: An Undisclosed Community Center
Event: Wednesday Knight Bash
Players: Phil, Steve and Bruce running Irish, list 156
Garth and John running Norman, list 179
Game System: L'Art de la Guerre, 15mm, 300 points per side.
Commanded by The High King, Rory O'Connor of Cannaught, Tiernan O'Rourke of Meath, MacDonlevy of Antrim & Down, with their allies Haskulf of Dublin. All are spoken highly of as men of character and nobility, but we won't mention the extremely lucky rune stone dice in Haskulf's pockets, and are all rated as Competent.
9 Irish Warriors, Medium Swordsmen, 2HW
6 Ostmen, Heavy Swords, Missile support
6 Irish Warriors led by pretentious bastards, HeavySword, Elite, 2HW
2 Huscarls, Heavy Swordsmen, Armor, 2HW, Elite
4 Warriors, Heavy Swordsmen, Missile Support
3 Kerns, Light Infantry, Javelin
6 Scouts, Light Infantry, Bow and sling
And our Kevin, he was Audrey's 2nd to Morgan, on a poney, Light Cavalry Javelin, Mediocre
Breakpoint of 37
The Normans
Commanded by Alan Fergent, the Count of Brittany, regarded as Competent. Eustace, the Count of Boulonge, also regarded as Competent, Robert, the Count of Mortain, the Competent, and Odo, the Bishop of Bayeux, who should have retired decades ago, the Competent.
17 Medium Knights, Impetuous, about half are Elite
4 Breton Scouts, Light Cavalry, Javelin
9 Norman Spearmen, Heavy Spearmen, Mediocre
2 Levy
2 Light Foot, Crossbow
Breakpoint 34
Display Conventions: When you see a word bubble like "Ouch!" or"Aoibh!", this implies a disorder from missiles. Letters in parenthesis represent some value change for the specific unit. For commanders it is s for strategist, b for Brilliant, c for Competent and o for Ordinary, u for unreliable. For troops it is e for Elite, and m for Mediocre. Other abbreviations, Hvy Heavy, XB Crossbow, LB, Longbow, Jav Javelin, 2HW 2 Handed Weapons, B Bow, Kn Knight, HKn Heavy Knight, HC Heavy Cavalry, Md Medium, Sgt Sergeants, LC Light Cavalry, Chr Chariot, Cat Cataphract, Pa Pavise, LI, Light Infantry, HG Hand Gun, FKn Foot Knight, Hvy Spear, Heavy Spearmen.
Inappropriately capitalized words are used to highlight terms that are specific to the game. For example Brilliant, Competent and Ordinary have specific game values for the commanders.
"XX" implies a unit killed in that location on that turn.
Any inaccuracies and vagueness as to specific units is to be regarded as fog of war and part of the fun.
The Initiative:
I recently copied an email list of other than ADLG ancients players. For their benefit, I am going to go into more detail of the play than normal. Particularly all the pre-game action like the initiative, the terrain placement, etc, that occur BEFORE turn 1.
For the normal readers, scroll down about 4 o 5 pages to "Turn 1".
"The Irish win the Initiative and elect to attack in the Plains".
What does this mean? The short explanation is there is a dice off between the players, and the high die gets the initiative. Which means he will determine, who is the attacker/defender and the terrain type the game will be played in.
When rolling the dice, one player will get to add up to 4 depending on the difference in the Init modifiers for his list. Your list can have an Init rating as low as zero, and as high as 6. Depending on the strength of your commanders, the number of lights, and a bonus +1 for a Strategist. The player with the higher value subtracts the lower value for his modifier. But this modifier cannot exceed 4, to give the lower Init player a chance to gain the Initiative.
In this case, both sides had an Init rating of 3, and so it was a simple dice off.
Winner decides who is attacking. And picks a terrain type from the DEFENDERS regions. There are 5 types, Plains, Mountains, Steppes, Desert, and Forest.
In this case the Attacker picked Plains. The types of terrain pieces available and the number of pieces is limited on a chart. For instance, there dominant terrain type in the plains is a Field. There can be up to 4 Fields in the plains. Other pieces available is Coastal (limit 1), Marsh (limit 1), Plantation (limit 2), Gentle Hill (limit 1), a Road (limit 1), and a Village (limit 1). No Woods or Steep Hills or Dunes.
The Defender takes a Field, as that is required in the plains and then can select 2-4 more pieces from the list. The Attacker then selects 2-4 more pieces from what is left.
On Placing the Terrain:
 |
| The board is divided into sixth's |
Both the Coastal and the Village first requires a 4+ roll to even take it as a piece. If not successful, the player picks another piece.
The Defender rolls and places his all his terrain first, then the Attacker.
So what do we have here...
 |
| A Gully (left) and a Field (right) rolled a 5 for placement, and a 4 or less for edge or not edge. They both can fit in the zone and are placed. |
 |
| The remaining Field rolled a 4 for the zone and a 5 for "not the edge" The Road rolled a 4 and 2 and must run from zone 4 to zone 2. Possibly the A6 going to Derry? |
After initial placement, there is an adjustment phase. The Attacker gets from zero to 3 adjustments. It depends on the number of terrain picks he chose, the fewer picks, the more adjustments.
He selects a piece and rolls the dice. On a 1 or 2, no adjustment. On a 3-4 he can move the piece 4 UD's. A UD in 15mm games is 40mm. On a 5 or 6 he can adjust a piece 6 UD's. Sometimes a 6 will allow him to remove a piece all together.
When completed, the Defender than gets to adjust. His rules for adjustment are identical to the attacker. So this is what happened.
As terrain adjustment phases go, not much difference in the overall battlefield. In other games this can have major effects as pieces wind up in the center, or disappear completely.
Deployment
After terrain is placed, the defender places his camp. The Attacker then places his camp.
The advantage of the defender is that he gets one addition piece of terrain to place, and has deeper zones to place ambushes.
The advantage of the attacker is he incrementally gets to see what the defender is doing and can react to it. He gets to see where the defenders camp is and then decides where his camp will be. In this game, not much effect. The Defenders camp is near the river, and so a flank march would not be an option to take it. In a 300 point game, the camp is worth 6 points. For armies with demoralization levels of 34-37, that is about 18%.
After the camps are placed, each side then makes their "Battle Plan". While this sounds complicated, it is merely a set of numbers from 1-4. In this case, the battle plan for the Irish read, "1, 4, 2, 3" and Ambush# 1 5 Medium Sword, Commander, Ambush #2, 4 Medium Sword.
The numbers mean that command 1 is on the left, command 3 is on the right, 4 and 2 are in the center.
The Defender places one command of his choice. The Attacker then place one command of his choice.
Repeat. Defender, then Attacker. The Attacker has the advantage of seeing the Defenders troops before placing his own.
And here is our battle field. Representing an area in the Pale in Ireland.
 |
| The board with all the defenders commands (or "Corps" in the rules or Battles as they were referred to historically) The attacker has one command left. |
The attackers command 4 has not yet been placed, but he has to honor his battle plan, and it must be between command 1, which is mostly hidden in the gully and 2, MacDonlevy's Ostmen.
My normal battle reports do not include this terrain placement and deployment, because it is boring, and frankly, I don't want to write it up. So I just start with...
Deployment:
 |
| Bishop Odo lines his large force of foot by the rivers edge. |
The figures are tiny, and the camera doesn't catch details, and frankly, one mass of unwashed foot looks like another. As each command is deployed, the player will introduce his troops. Each element must be precisely identified. Odo is a Competent commander and has 9 Elements of Heavy Spear Mediocre, 2 elements of Levy and 2 elements of light foot with crossbow.
 |
| The middle two battles are all Medium Knights, interleaved Elite and Ordinary with Competent Commanders. |
The names of the commanders have no game value and are provided for the sake of this narrative. Most players do not name their commanders as they are totally unnecessary to the game play. Only their qualities, Be they a Strategist, Brilliant, Competent, Ordinary, Unreliable and Allied.
 |
| The Norman left is 6 more troops of knights. Again half are Elite. |
 |
| Taking advantage of the Gully, the Irish are hiding their weaker "Medium Sword" troops. |
Medium Sword are the Orcs of this game. But they do not suffer a penalty for being in the rough.
Medium foot are the same as Light Mediums in Warrior(tm) or WRG v5-7.
Heavy Sword are the same as Medium foot in Warrior(tm) or WRG v5-7.
The difference is formation and not armor.
 |
| The Irish have broken into their piggy bank and hired a force of Norsemen to the cause. |
Looking at the list near the top, the Huscarls are listed as Heavy Swordsmen, Armor, Elite, 2HW. In Warrior(tm)/WRG parlance they would be Regular 'B', HI, 2HW.
The rest are Heavy Swordsmen, Missile Support. In Warrior(tm)/WRG parlance they would be Regular 'C', MI, Other Weapons. Missile Support doesn't really have an analog in Warrior. They do not shoot in ADLG, but cancel the effects of mounted Furious Charge, and subtract 1 from the melee dice difference if they LOSE the first round of combat. After the first round, missile support does nothing.
The Commander, is listed as a for Allied and c for Competent. Allied and Unreliable troops have a chance of going Unresponsive.
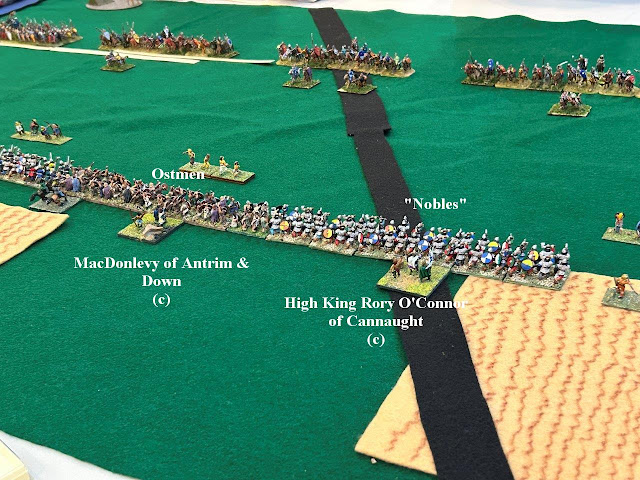 |
| MacDonlevy's Ostmen take center right, while the High King, with the best troops in the army, take the right. |
The Irish troops are a mixed bag of troops, and care must be taken to keep them straight, as one dark age trash looks like another.
Just looking at the battle lines, the troops all look alike to the eyeball. They have Heavy Swords with Missile support, Heavy Swords that are Elite and 2HW, Heavy Swords that have Armor, and 2HW and are Elite, and Heavy Swordsmen with Missile Support.
Turn 1:
We will simplify the first turn with the general advances.
 |
| The Viking Allied command rolls a 1 for command points, and goes unresponsive. It cannot move unless it rolls a six on a subsequent bound, OR, an enemy unit gets within 4 UD's of any of it's units |
 |
| The Normans order a general advance. Including moving their light horse within 4 UD's of the Viking's skirmishers, releasing the command. |
Turn 2:
 |
| The Vikings try to keep up with the front line, but the Irish won't wait for them, and advance to within one UD of two Norman Corps of knights. |
If a unit is within 1 UD of another units front, it is in it's zone of control, or ZOC. That means it's options as to what it can do is very limited. Usually just charge or "Exit a ZOC", which is somewhat random, and may be subject to penalties.
What the Irish are doing is forcing the Norman knights to charge. If the knights do not charge, then over to the Irish right, the Irish will push past the Norman flank, then start charging down the line with a great benefit.
 |
| The Knights charge down the line. And not very effective. Of 12 battles, the knights lose 5, win 4 and tie 3. |
 |
| To help protect their hanging flank, the Normans commit one of their scouts. It's only light cavalry, but that is enough to keep the Irish Heavies honest. |
Turn 3:
 |
| The Irish skirmishers are dispersed by their Norman counterparts. |
A note on the red splot dead marker. These markers have no actual bearing on the game. Their placement is not part of the rules set. They are placed here, by agreement from both sides, for the sake of the narrative of the battle report, to give you, the reader, some idea of where the action is occurring.
 |
| The Vikings advance as quick as able. |
 |
| Kevin (left splot) is sent home to his mother. A troop of knights (right splot) are routed. |
The rest of this fight is a lot of noise, with rare hits.
Their charge spent, the knights are down to "Other Cavalry Weapons", and many are disordered. Their one advantages is they are all armored, and half are elite.
Armor adds one to the die roll if you lose the battle, and possibly reduces any damage to zero.
Elite adds one to the die if you roll poorly, a 1,2, or 3.
 |
| Bishop Odo's spear advance slowly |
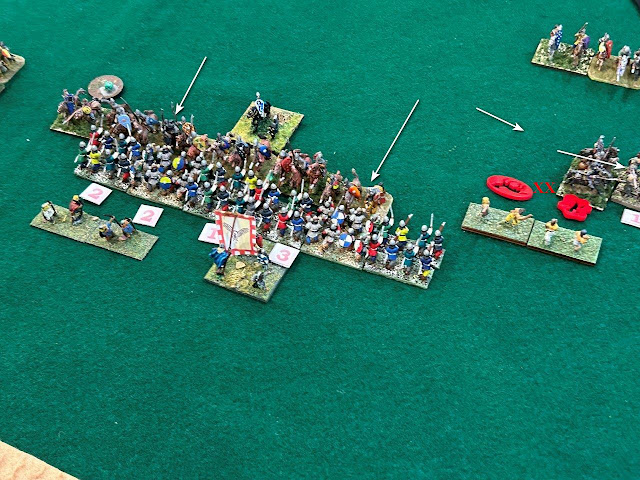 |
| Alan Fergents knights charge. Winning 4 of 5 battles. |
 |
| A Knight has slipped behind the Ostman line last turn, and now turns and charges. A warband is immediately routed, and he pursues into the next in line. |
The remaining knights perform a difficult maneuver of Disengaging from the front lines.
.jpg) |
| In addition to preparing to charge again, by Disengaging, the knights flank is not being threatened any more. |
 |
| Bodies are beginning to float in the River Liffy. The Irish count is 17 |
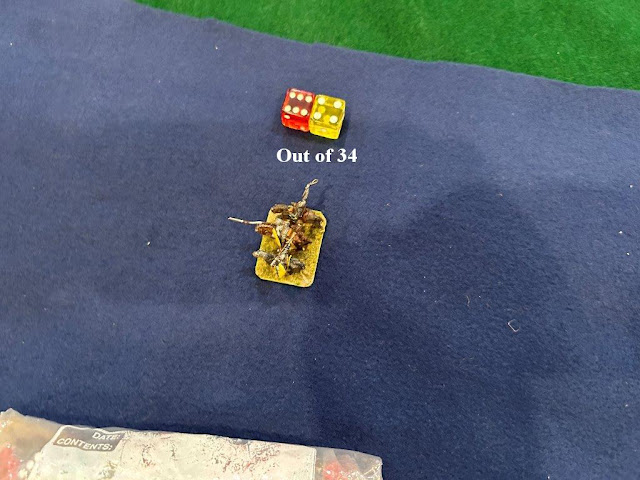 |
| The Normans are just at 10 |
Turn 4:
 |
| Tiernan O'Rourke orders his men to attack. 9 elements of Medium Swordsmen. |
Each ambush marker has a number of elements assigned to it. The actual position and facing of the elements is not listed. All that is required of the ambush is that ONE element has to fit in the ambush marker, and the rest have to form a legitimate group.
In this example, the left ambush formed a group facing the left side of the board, and wheeled out. The right group formed a column of 4 elements and went forward.
 |
| Haskulf's vikings are beginning to crack |
In the green circle is a fight between a disordered knight that attacked an Ostman sword in the flank the previous bound. This is round 1 of that fight.
 |
| The Irish advance, putting pressure on the Norman knights. |
 |
| The Irish count only adds one this round to 18 |
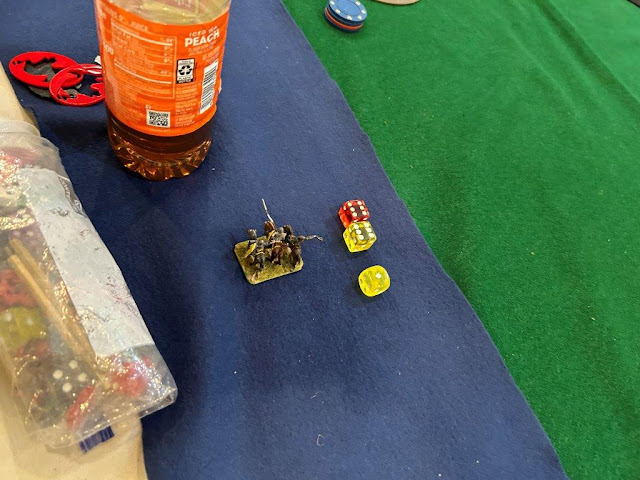 |
| The Normans have added 3 to 13 |
 |
| Bishop Odo's spear advance ever closer to the Irish foot. |
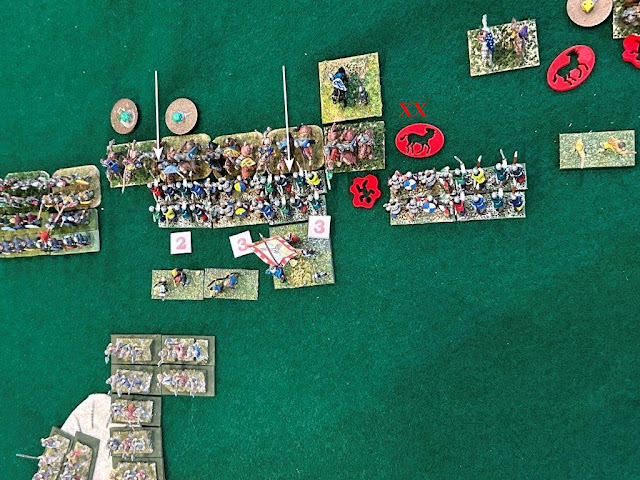 |
| The battle with the Vikings continues. Ignore the movement arrows on the screen. |
 |
| The Knights charge again. But many falter and fall before Irish axes. |
 |
| The Irish dead count is incrementing slowly. |
 |
| The Norman count is incrementing much faster. |
The score is a virtual tie at this point. The Irish at 19 of 37, the Normans at 17 of 34.
Turn 5:
 |
| One Irish foot is sent ahead to support the Vikings. The others continue to form up. |
 |
| On the left of the line, a Viking sword runs off a Norman scout. On right, an Irish Noble charges a knight in the flank, scoring a hit. The photo shows the knight conforming to it's attackers. |
 |
| The River Liffy is now choking with bodies. The Irish are at 24! |
 |
| The Normans at 20 |
 |
| Bishop Odo's spear line splits, and charges into contact. |
Another spearman flank charges a Viking sword. But dice were unkind, and even with the spear on the vikings flank, the vikings still managed to rout the knights they were facing.
 |
| The battle continues against the Ostmen. |
The battle in the green circle also continues. But I see I missed the actual 3rd round, and this is the 4th.
 |
| A knight moves to support it's brother knights. |
 |
| The Irish are at 27 of 37 |
 |
| The Normans are at 22 of 34 |
Turn 6:
 |
| The view from the side. |
 |
| Tiernan O'Rourke's swords rout a Norman spear. |
 |
| Ostmen push beyond the front of a knight. |
And the battle in the green circle is now 5 rounds and going.
 |
| The Irish are at 27, 10 away from Demoralization. |
 |
| The Normans are at 26, 8 away from Demoralization. |
 |
| Odo's spear continue to advance. |
Note on the right, a Knight has charged a Irish sword in the flank. Again fortune favors the fool-hearty, and the Irish just avoid being routed.
 |
| The Viking command is defeated in entirety. |
 |
| Norman knights pull another Disengage for a final charge. |
 |
| A curly line to make some sense of the chaos. |
 |
| The Irish are at 35, just 2 away from demoralization. |
 |
| The Normans are at 27. A comfortable 7 away from demoralization. |
We called it here with a Norman win assumed. At the beginning of the 7th turn, they had one point guaranteed, with a disordered Irish Medium Sword flanked against a heavy spear, but flanked by a knight. But the second point would prove elusive. Meanwhile the Irish could pick up 1 definitely, and 2 more probable points, taking the Normans to 30.
But at the bottom of the turn, the Normans would certainly pick up at least one more point and as many as 3 for the win.
So why play L' Art de la Guerre over Warrior(tm)?
I have played WRG and Warrior for over 30 years. ADLG for 8 now. So I have many more years experience with WRG, but I suspect, more games played with ADLG. I have 350 battle reports of ADLG games written, and I have not written all of them up.
So which game is better?
Logistics
ADLG. At 18-30 elements per army, the smaller size means better portability. I use a small tool box to carry the army and the terrain.
Detail
Warrior. There are many more nuances with Warrior.
Presentation
Warrior, hands down. Armies of up to 500 figures fill a table. The Elephant themed tourney had 16 elephant figures on just one side of the board.
Rules
ADLG. ADLG rules are simpler and easier to teach The rule books for ADLG and Warrior are of similar size, but the rules part of the ADLG book is just 40% of the book. The rest is the army lists.
Cost.
ADLG. Fewer figures to buy and paint. Only one book to purchase
Tactics.
Warrior. There is more details with units and their behaviors to consider.
Strategy
Tie. Both sides rely on a certain amount of rock-paper-sissors on unit match-ups. Both offer off board flank marches, both offer ambushes.
Player Endurance
ADLG. Shorter games. 2.5 hours for ADLG with terrain picks vice 3.5 hours for Warrior with the terrain prelaid. 4 hours with terrain picks as part of the game.


No comments:
Post a Comment