Friday, May 26, 2017

1066, Hastings Revisited

A Headless Body Production

Location:  Regency at Providence Community Center, Phoenixville, Pa
Event:        Providence Gamer's Game Knight
Players:     Philip Harry Gardocki playing the Saxon King Harold Godwinsn
                      Bruce William Potter playing Duke William the Bastard of Normandy

                      And yes, those are our real middle names.

Preamble:   In a world before Brexit, England was known for its multiculturalism and fierce independence.  Where strange men bounced around the countryside to blood thumping background music, their servants banging coconuts in their wake.   But there were those in Europe,  who looked upon England with envious eyes, and made their plans.   
(Oh, I know I used the same preamble in the Vikings vs. Picts AAR, but it works!)

Game System: L'Art de la Guerre, about 200 points per side.
Scenario:  European bureaucrats, armed with lance and bow,  propose a merger with the ruling Saxons of pre-Brexit England.
(Why break a theme now?)

The Forces:
Duke William the Bastard of Normandy (1028-1087), armed with a an order of excommunication from the Pope Alexander II, and escorted by a couple thousand glory seeking Knights, and a few thousand foot soldiers from Brittany and Normandy.
 
      6 Milites, Medium Knights, Impetuous, Elite
      6 Norman Heavy Spearmen
      3 Breton Heavy Spearmen, Armor
      4 Bowmen
      2 Gascon Scouts, Light Cavalry, Javelin
       Break point 22

King Harold Godwinson of England (1022-1098), arrives in field with a large body of armored fyrd, lead by his brothers and their own elite Huscarls.


      4 Huscarls, Heavy Swordsmen, Armor, 2HW, Elite.
      10 Anglo-Saxon Warriors, Heavy Spearmen, Armor
      8 Light Infantry, bows, javelins, slings
      2 Levey
       Break point 25

All generals in this game are Competent.  Just to keep things simple.


Deployment:
King Harold Godwinson has home-field advantage, and elects to defend in the forest.  He selects two gentle hills and two woods.  William selects a road and an impassable. 


The Heathfield-Hastings Road astride Senlac Hill.   Where King Harold cunningly paid a number of boys to go fishing in boats in the nearby watershed, leaving the Normans to think it was a lake and thus impassable.
However, the rest of the board is as smooth as a babies bottom.
Duke William is pondering his battle plan.
King Godwinson, after setting up his camp among the sacred stones deploys his battles.  His brother Gyrth is to the left of Senlac hill.  His other brother, Leofwine on the right.  While he remains behind the hill assessing the Norman positions.
William deploys is two infantry battles on his right, with the left battle of knights attempting an on board flank attack.


A close up view.
Turn 1:
The Norman Infantry battles advance at the quick march.  But William rolls a 1 for command points.  He splits his 2 points between his knights and his Gascon Scouts.


In another world, another story, King Harold Godwinson was so distraught at the news that he was damned by God himself, that he did not leave his tent, nor issue any orders during the battle.  But that is not this world.  He extorts his troops to trot up Senlac hill.  His brother Gyrth hugging his left.  
His other brother Leofwine, who will have to contend with the Norman Knights, advances just enough to keep the gap between the battles to a minimum.
Missiles fly.  And Saxon archery proves superior.
Turn 2:
The Normans realize the danger that King Godwinson may have higher ground, and stop to shoot it out.  This will also give a more time for William's Knights to get into position.  Vital rallies his Bowmen, and they destroy a Saxon shooter. 
William rolls another 1 for command points.  And so his advance stalls.
Gyrth and Harold's commands do not delay and continue their march.  They are now within charge reach.
Saxon Slingers score against both their opponents.
So to, a Saxon archer.
Leofwine knows his role here.  His mission is to not be defeated by Norman Knights.  The longer it takes before contact, the better.
Turn 3:
The Duke of Normandy finally gets more then two command points together.  Three to be exact.  His knights are too far away to get within charge range, and too close for double move. 
With the knights still not in attack position, the Norman and Bretons continue to hold and attempt rallies.  Their words proved uninspiring as a series of 1's and 2's was rolled.
Gyrth and King Harold's forces charge down the line.  While the hills prove to be slippery slopes, see left of frame, the support provided by overlaps prove enough, as Norman foot down the line begin to falter. 
King Harold's charge may prove over eager.  His brother, Leofwine can only advance so fast and keep the flank secure.  There is a gap between the battle-lines now, and the Normans are in it.
Gascon Scouts are trying to get behind the flanks.  But Saxon Skirmishers so far have frustrated their efforts.
Turn 4:
The scrum on the left continues. The Saxon advantage of armor and 2HW makes itself felt as more Norman units are routed, but it is not totally one sided, as many Saxons units pick up multiple hits.
In the middle, Fergant exploits the gap between the Saxon Battles, and flank charges a Saxon unit.  Which narrowly avoids destruction.
The Norman Knights faced a problem. Two of the Knights could charge the Saxon line.  But the rest were out of range.  The Saxon units are armed with spear, so the combat would be +3 Saxon to + 1 Norman. To avoid being defeated in detail, William spends 3command points, to turn and march his knights away.
The Norman  right hand battle is largely destroyed, while the center battle takes serious damage.
Harold's right flank continues to hold.  Despite being flanked, they destroyed their frontal opponents, and then conformed to their flankers.  Harold sent encouraging words and they rallied to 2 points.  Thus narrowly avoiding defeat when the Normans managed to hit them again.
Leofwine has had enough of the waiting game.  He faces the Gascon Scouts with a combination of Levy and Lights, and rushes forward to clip the wing off of the Norman center battle.
The Satellite view of the battle.  Of the Norman right side Battle, only two units remain. 
Turn 5:
A cry erupts among the Saxon lines, "Nerian ân for ðâm ðe me"*
The Norman center holds the line.  William's Knights turn and it looks like they will turn Leofwine's flank at last.
The Gascon scouts are content to throw Javelins. As are the Saxons.
The Saxons surround and destroy the last of Vital's Battle.  This removes him from the field as well.
Leofwine matches the remaining Normans 1 for 1, and turns two Spearmen to face the Norman Knights.  If the Norman Infantry is defeated, the Knights will retreat. 
William has hard choices to make.  Impetuous Knights are really hard to maneuver. 

"A message for you sir!".  A blood soaked Saxon warrior approaches, breathing heavily from his run, and armed with only a knife and a piece of parchment.  It is an offer of good will from King Godwinson!  He offers to pay the price of the ferry back to Normandy for each of the Norman Knights, AND their horses.

Turn 6:
Saxon warriors take a breather, save King Godwinson's own Huscarls, of which he is personally leading.
Leofwines men have many advantages, but the Normans and their Breton allies fight like madman.  A Saxon warrior is routed. 
The Duke of Normandy ponders King Godwinson's offer.  But doesn't want his Battle to be defeated without having fought, and commands the Gascons to attack the Levy in their path.
Either the Gascons are dispirited, or the Levies embolden, this attack falters as well.
Gyrth rolls all the command points.  He assembles what forces he has to march on the center to support his brother and king.
King Harold (1022-1098), is seeing to the reforming of his lines as well.  Leofwine, embarrassed by this poorly performing line, redoubles his encouragement.  Destroying a Breton Heavy Spearmen, and turning the remains of the Norman line.
Alone, and unloved, the Levy destroy one of the Gascon Scouts.
Duke William (1028-1087) the Bastard of Normandy .  His knights finally in position for a thunderous charge, accepts King Harold Godwinson (1022-1098) of England's offer to ferry his troops back to Normandy.

What went right?  Just about everything broke for the Saxons this day.  The terrain, though "Forested" had one of the forests go undeployed due to fit issues.  Between Senlac hill dominating the middle of the board and an impassable swamp in the corner practically dictated where the Norman Knights would be.  Assigning a large force of spear to a refuse flank position (Leofwine's battle) effectively took the knights out of the game.

Then the Norman Knight battle rolled two 1's in a row for command points, limited their advance, giving the Saxon's a chance to engage their weaker Norman infantry counterparts. 

When overlapped Levy's win a fight, well, that just means it is time to buy some lottery tickets.


*"Save one for me!"


Friday, May 19, 2017

Picts Under Siege

A Headless Body Production

Location:  Regency at Providence Community Center, Phoenixville, Pa
Event:        Providence Gamer's Game Knight
Players:     Phil Gardocki and Garth Parker, playing the Picts
                      Bruce Potter playing Vikings

Official Warning:   This battle report is Rated NC17 (dePicts nudity), and contains nuts, lead and sharp pointy things. (do not eat!)

Preamble:   In a world before Brexit, England was known for its multiculturalism and fierce independence.  Where strange men bounced around the countryside to blood thumping background music, their servants banging coconuts in their wake.   But there were those in Europe,  who looked upon England with envious eyes, and made their plans.  

Game System: L'Art de la Guerre, about 200 points per side.
Scenario:  European bureaucrats, armed with axes and Irish,  propose a merger with the natives of pre-Brexit Scotland.

The Forces:
Picts, led by the puny milk-livered mammet and barely competent, Larry, his brother, the frothy fat-kidneyed flax-wench, Darryl, and his other brother, the warped tickle-brained varlot Darryl.
      12 Warriors, Medium Spearmen, Missile Support
      4 Atecotti, Medium Swordsmen, Impetuous (elite) 
      4 Heroes, Light Chariots (elite)
      4 Light Cavalry, Javelin
       Break point 25

Vikings, led by the Hagar the Horrible, Eric the Eliminator and Sven the Savage, all Competent.

      6 Huscarls, Heavy Swordsmen, Armor, 2HW ( 8 elite)
      4 Irish Mercenaries, Medium swordsmen, 2HW
      8 Warriors, Heavy Swordsmen, impetuous
      2 Bowmen
       Break point 21

Deployment:
The Picts won the initiative roll and elected to receive the Vikings in the forest.

The terrain fell entirely on the left side of the board.  This greatly affected the deployments.
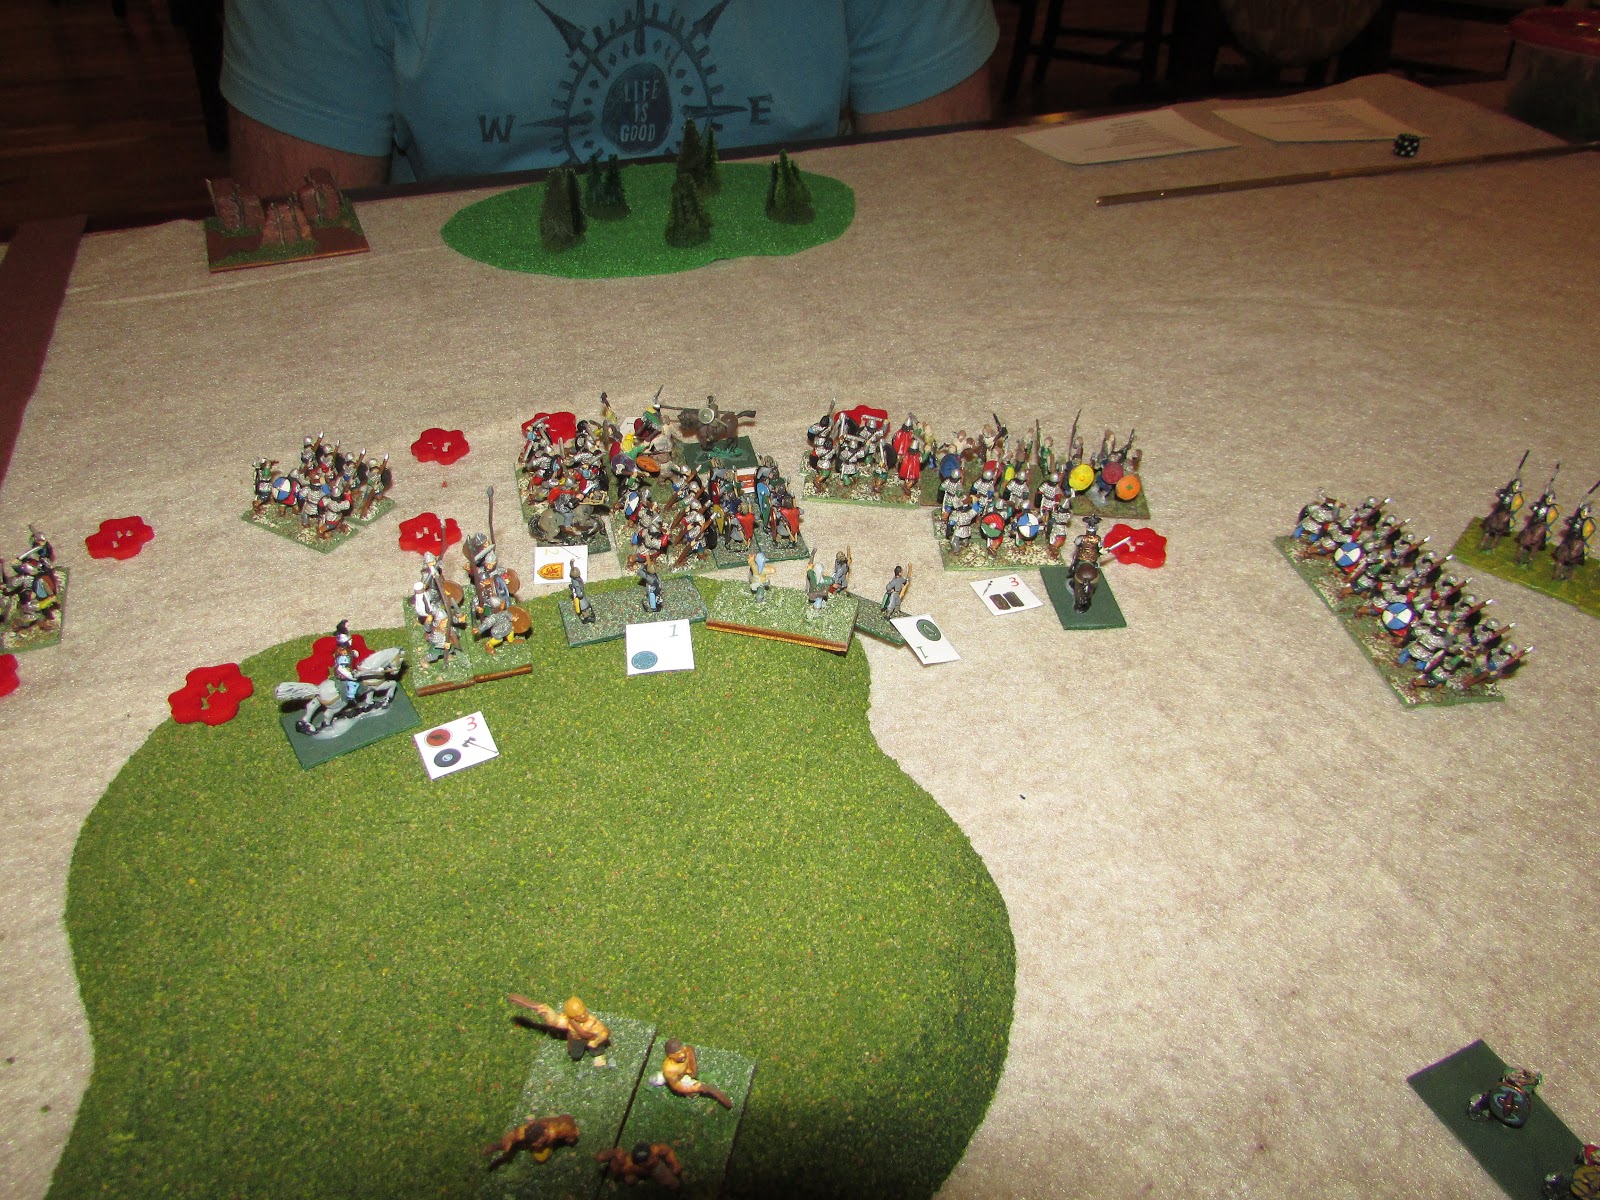
The Vikings picked the all Heavy Infantry option, ans deployed solidly on their left.  The Picts had half their army on the right, the other half just left of the center.
Only some of the Picts on the left can be seen.
Odin is watching, providing all kinds of incentive for the Norse to fight well.

Mixed metaphors here.  Viking troops, an Asterix "action figure", and a shirt espousing Scottish philosophy.
Experimenting with the flash.
The Vikings double move across the board.  Some swordsmen angling to receive the expected Pict flank charges.
The Picts run out to meet the invader.
The left flank Picts with only 2 command points, and advance as well as they can.
Leaving their hidden cavalry and chariots without orders.
Turn 2:
The Vikings got one shot off with their bowmen on turn 1, and then interpenetrated them with the Huscarls on turn 2.  The Picts would have been more than happy to selectively charge the bowmen.  The Huscarls though, are another story. They seem to have all the advantages.  They take 4 hits vice 3, they have a +1 if they win (2HW), +1 if they lose (Armor), win ties (2HW vs Spear) and a +1 if they roll poorly (Elite).  

And on the right, we have Light Chariots and Light Cavalry vs Heavy Swordsmen.
The left command of Picts double time some of their troops, the rest are within 4 U.D.'s of the Vikings.
The War leader on the right, rolls 4 command points, and is in full control of is impetuous troops.  He holds them back waiting for the rest of the army to get into place.
Turn 3:
On the far right, there is a charge and an evade.  Odin approves this charge.  Huscarl Swordsmen advance to charge range of the Picts.
The Viking forces on the left are slowly advancing as well.
With spare command points, the right side chariots are loose!

The woods really slow things down.  Especially if you are wheeling.
First blood to the Vikings.
Turn 4:
You wouldn't think it would take so long for two barbarian hordes to close to contact.

The Huscarls charge. Two Pict Warbands are destroyed.  Two more are damaged.  The Atecotti however, both win, causing extra damage with their Furious charges.
The other Pict command is in reach.
The original intention of this 4 horse command was to sweep the flanks.  Now its choices seem to be die or flee the board.
The original thought was for the left side horse to race around the flanks and possibly the camp.  That idea went out the window due to the reality check of the terrain, the shortage of command points for the command (7 total in 3 turns), and the fact that Light Chariots do NOT have the double command range like Light Horse.  Now I just hope to get a Light Chariot charge on Medium Foot.
Darryl is living up to his reputation as a frothy fat-kidneyed flax-wench.  But even he can only accept so many taunts before charging in.  His troops do well, winning 3 out of 4.
In the center, the Picts win 1 and lose 1.  Not bad considering all the Huscarl's advantages.
On the right flank, the Chariots are trying to squeeze their way out.  The Light Horse is teasing the far right with their Javelins.
The overall view of the corner.  The Vikings are doing well at not being overwhelmed by Pict numbers.
Turn 5:
On the far right, the Vikings have charged, not quite reaching the Hero's chariots, and not quite running the Light Horse off of the board.  But they have turned the Atecotti's flank, destroying it.
Quality over Quantity, another warband falls in the center.
On the Pict left, a series of wins for the Viking Warriors.  Another warband falls.
The final Pict Warbands charge in, the stalworth Irish Mercenaries stand their ground winning each fight.  But it the battle is not totally one sided as two Viking Warriors also fall, taking their War-Chief Sven the Savage with them!
The Hero's on the right finally get into a fight.  Bolstering the Pict flank at an important time.
The Viking right is now looking for somewhere to go. 
Most of the Vikings on the right are heavy swordsmen, impetuous, and so are also unmaneuverable.  In L' Art de la Gurerre, that is represented by an extra command cost to turn, 2 vice 1.  And with Heavy Infantry, a unit can only move 1UD after making that turn.   It will take a while for this force to turn and support the center.

Turn 6:
A pair of victories for the Vikings here.  Destroying a unit on the hill, and on the left flank.  The Hero's on their chariots arrive in theater just in time to have skies darken with arrows.
The last Atacotti falls to a flank charge.  Their war leader, the puny milk-livered mammet, Larry, flees to a nearby warband.


The entire Viking left is looking for a target.
Is this what it's all about?  A few pigs and a couple of dead cows rotting in the sun?
What is left of the Pict center rages on.
Darryl's heroes are hoping for a 6-1 to win this fight.  And a 6-1 it is!  Wait a minute....
The Picts are not out of this yet.  Through a combination of flank attacks, and just plain old British Pre-Brexit gumption, 4 Viking and Mercenary warbands are routed, another damaged, while two other Viking warbands are surrounded! 
I think the term "Bloody Hell" is appropriate here.
Final shot.
With the destruction of the chariot borne Heroes, the Picts hit their demoralization score of 25.  The Vikings were at 17 of 21.  So this was a very narrow game indeed.

A couple of games ago I hit the realization that loose order troops, "Medium Infantry" in L'Art de la Guerre parlance really to not play well in the woods.  This was reinforced here.  Yes they can run through the wooded hill, but at reduced speeds.  The Pict center realized that the flanking left Picts were not going to keep their schedule and attack at the same time and was lucky enough to roll enough command points to keep the impetuous troops in check.  

But they could only hold on so long, as the Vikings were also impetuous and forced the line almost two turns before the Pict left was ready.  The left flank did very well, just not soon enough to help the center much.  

Another thought was with the deployment, the way the terrain fell.  The left side was cluttered, the right was bare.  This forced the Vikings Heavies to be deployed almost entirely on the right.  The Picts should have realized there would be no room to maneuver for their lights and chariots over there and placed them elsewhere.  Not taking that into account was almost a disaster.