A Headless Body Production
Venue: An Undisclosed Basement
Event: Playing a game for the camera
Players: Phil Gardocki running Korean
Tom Worden running Samurai
Game System: L'Art de la Guerre, 15mm, 200 points per side.
Never Fight a Land War in Asia. To fulfill this bit of wisdom, the commanders, Larry-San and Kim-Lar-Re agree to take their tête-à-tête to the grounds of the Leeside Football Club, next to the Lough Mahon, in Cork, Ireland.
The Forces:
Samurai (list 210)
The
Samurai are commanded by Larry-San, the Strategist, his brother
Darryl-San the Ordinary and his other brother Darryl-San, also Ordinary.
9 Samurai, Medium Swordsmen, Bow, Elite
4 Yari, Medium Spearmen, Mediocre
4 Mounted Samurai, Heavy Cavalry, Bow, Elite
2 Followers with Bow, Bowmen, Mediocre
Breakpoint of 19
Koryo Korean (list 212)
The
Koreans are commanded by Kim-Lar-Re, the Competent, his brother
Kim-Dar-El, the Competent, and his other brother Kim-Dar-El, also
Competent.
2 Guardsmen, Heavy Cavalry Impact, Elite
2 Horsemen, Heavy Cavalry Impact, Ordinary
2 Militia Horsemen, Medium Cavalry Impact, Mediocre.
6 Spearmen, 1/2 Heavy Spearmen, 1/2 Crossbow
1 Cataphract, Elite
2 Light Cavalry, Bow
2 War Wagons, Crossbow
1 Light Infantry, Bow
1 Hwacha, Heavy Artillery.
1 Guardsmen, Crossbow, Pavise, Elite
Breakpoint of 21
The
Hwacha artillery is a multiple barrel launcher, where each piece is a
rocket propelled arrow, and some explosive material. Up to 200 rockets
could be fired in a few seconds. Think of it as throwing 200 Rocket Propelled Grenades down range in about 10 seconds. Mythbusters made and tested one on their show.
The Board:
The Samurai win the initiative and elect to defend in the plains.
However, the one terrain piece that fell on their side of the board was removed with an adjustment die roll of "6".
 |
| The Samurai Cavalry deploys on the right. They are supported by 3 units of foot Samurai with odd names. |
The jokes in this frame are American centric, Leave a message if you get them.
 |
| The rest of the Samurai army has their flank anchored to the Lough. |
 |
| Holding the left flank are two War Wagons |
 |
| The Korean center is a concentrated force of Crossbow armed Spearmen. |
 |
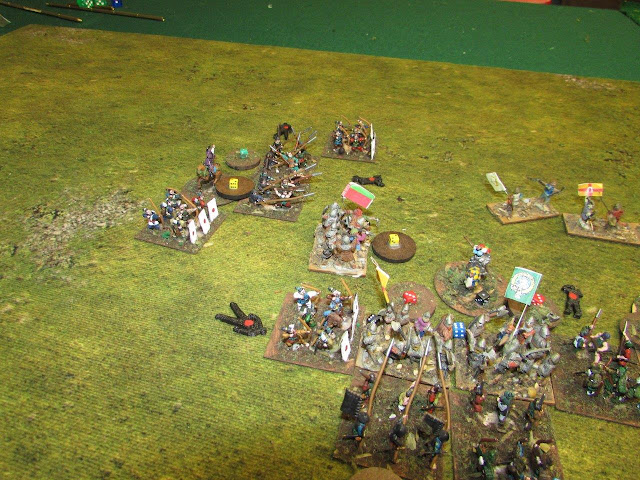
| On the right are the mass of Cavalry. It is Kim-Lar-Re's hope he will drive through the mediums, take the camp, and win the game. |
Turn 1:
 |
| Hwacha doing? Probably nothing as the Koreans are on the attack. But it could have been a bit further forward. |
 |
| The main battleline of heavy foot contracts as it advances. The thought is if the Samurai Cavalry come their way, two units can turn and face them. |
 |
| The Korean Cavalry advance to just out of bow reach. |
A
note about the sudden change in color from green to brown. The
camera's flash was set to "auto". So that the left side of the field
had insufficient light, so the flash went off, giving the field the
correct coloration of green. The right side of the field was judged
sufficient light from the overhead lighting, but is a brown coloration
found in florescent bulbs. The overhead lights are 4 tubes of 5,000
kelvin LED's, but also one huge curly LED rated at 300w, but probably
2,700 kelvin, which dominates the color scheme.
For more on LED Lighting and an explanation on Kelvins, I wrote
this article many years ago.
 |
| The Strategist orders his line to turn left and double march. |
 |
The remaining Japanese advance slightly and loose arrows. Scoring two hits.
|
Turn 2:
 |
| Kim-Lar-Re advances to charge reach, his cavalry screened by lights from the massive volleys of arrows being put out by the Samurai. |
 |
| The Samurai Cavalry/Foot command lines up with their remaining line and loose arrows. |
 |
| The contest between elite and ordinary begins, with predictable results. |
 |
| Bonehead move!. Both light horse are destroyed by archery, disordering the lancers behind them. |
I honestly thought when a unit is routed by bow fire that it did not make a rout move.
I was wrong. (pg 61 para 1 and 2) (and fully qualified for the dense on pg 23 in the FAQ)
 |
| The count at the Tree of Woe is 11-0 |
Turn 3:
 |
| The Wagons trundle along, focusing their firepower on the perceived axis of advance by the Samurai Horsemen. |
 |
| Kim-Dar-el rallies one unit successfully. He orders his Cataphracts forward to support Kim-Lar-Re's cavalry charge. |
 |
| Because when you are down 11-0, and are out shot elite vs ordinary, the ONLY choice is to charge in and hope for luck to save your sorry butt. |
And the results are: One "Followers with Bow"was destroyed, one Samurai disordered, two ties, and two losses.
 |
| One Samurai Horsemen is playing off the flank games with the War Wagon. Which is fine by me as I have shots at this point. Also it's a zero (elite) to 2 dice off. |
 |
| The main Korean battleline is beginning to creak. |
 |
| Despite being mostly disordered, the Korean shock cavalry is doing better than expected. 2 Samurai units killed to one horseman. |
 |
| Bringing the score to 13-6 ( out of 21-19) |
Turn 4:
 |
| War Wagons score their first hit. |
The real purpose of the War Wagons is to protect the flanks from cavalry. Any scores from missile fire is considered a bonus. Which is a good thing, as they only scored one hit the whole game.
 |
| The Korean Spear line buckles more, but that is why I bring Heavy Foot, they can take the punishment. The Cataphracts charge in, nearly dispersing their opponents on impact. |
 |
| The Cavalry charge trades a horse for a foot unit. But has turned the flank of the Samurai. |
 |
| The dead pile up at the Tree of Woe. |
 |
| The Samurai Strategist decides it is worth his command points to swat the only Korean Light Foot. |
In retrospect, he was right.
 |
| More buckling of the main line. Korean spearmen are 4/6ths disordered, 1/6th dead to one Samurai disordered. |
I am wondering when will the Samurai commit to swords, elite vs mediocre would be short work. But Tom is content to just let the arrows fly.
 |
| The Cataphract destroys his opponent. The Samurai bring up their reserves, preventing a flank charge by cavalry, and also flanking the Korean Horsemen. |
 |
| At the bottom of the 4th, the score is 17-11 |
Turn 5:
 |
| More shooting on the left, a Samurai Horsemen is disordered. |
 |
| Kim-Dar-El keeps trying to rally his troops, with some effect. |
 |
| Two more Japanese foot units are destroyed. One to Cataphracts in the way back, one to a flank charge. But Kim-Lar-Re is going to suffer a flank charge as well, and he is fighting in the front lines. |
 |
| The score is tightening, 15-16 |
 |
| The Japanese commander tries to rally, and fails. His other horsemen line up for missile fire. Another spearmen is destroyed. But a Samurai horsemen is now in range and arc of the Hwacha! |
 |
| The Koreans have fired over 60,000 bolts, and so far have only disordered one Samurai unit. |
|
|
 |
| And you thought this was artistic license. |
 |
| Kim-Lar-Re is flank charged, and his unit takes two hits, but he lives! |
 |
| The pile of the dead is rising |
Turn 6:
 |
| The Hwacha crew awakes from their nap and fires, but misses. This despite 3 supporting shots. |
Hwacha load of
garbage.
 |
| Kim-Dar-El continues to rally. He has forgotten about his Cataphracts in the rear. |
He had the command points to move the Cataphracts. He could have had them in strike range of the Japanese camp for turn 7, which could win the game. Instead they were spent on 3 failed rallies.
 |
| A Guards Cavalry is destroyed, Kim-Lar-Re narrowly escapes to the adjacent Guards. |
 |
| The game is very close 20-17 Each side is only 1-2 points from demoralization. |
 |
| Another shot of the Hwacha, with 3 supports! Another miss. |
 |
| But the last straw is hit with a Korean Horse Guards taking the it's first hit. |
 |
| Bringing the final score to 21-17. |
What went wrong?
The Korean plan was solid. The execution was flawed. And it was all lost on the basics. Don't have units in the rout path. Totally stupid. Especially since I had to deploy Tom's units, he was very specific how far back his reserves were to avoid the same problem. Even with that error, the Koreans nearly broke through to the camp.
Other errors was the handling of the Korean Spear/Crossbow units. I had two units on the left flank that were miss handled, and suffered an extra dead unit as a result.
Then there was the Light Foot unit. I ran it up in the rear of the Samurai Horsemen for an extra support shot. Which failed, then the Lights was caught and killed. Avoiding any one of those mistakes would have allowed the game to go to turn 7, and victory could have been had, or at least a mutual destruction.


