A Headless Body Production
Venue: Havre De Grace Community Center
Event: Barrage's L'Art de la Guerre's Open Tournament, Round 2,
Players: Phil Gardocki, running Republican Roman
David Guinn, Feudal Irish.
Game System: L'Art de la Guerre, 200 points per side.
The Forces:
Roman: Commanders Marius, 3rd founder of Rome (Brilliant), Darrylius and Darrylius (Both Competent)
8 Legionnaires, Heavy Impact Swordsmen, Armor
2 Triarii, Heavy Spearmen, Armor (elite)
1 Roman Cavalry, Medium Cavalry (elite)
3 Velites, Light Infantry, Javelin (2 elite)
2 Illyrians, Light Cavalry, Javelin
1 Elephant (Mediocre)
2 Extraordinarii, Medium Swordsmen (Elite)
1 Thureophoroi, Medium Spearmen
Breakpoint...21
The Irish...
Dominant troop types were Galloglaich (Elite Heavy Infantry Swordsmen, 2 Handed), Ostmen, (Heavy Infantry Swordsmen), Irish Foot (a mix of Medium Infantry Javelinmen and 2 Handed Swordsmen).
Breakpoint...23
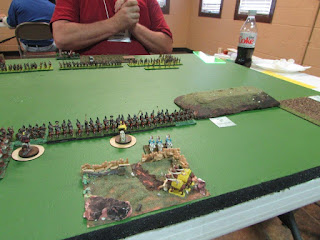
The Board:
The Romans win the initiative and elect to defend in the plains. The other choice was to attack into the forest.
Deployment:
The Irish army is familiar to me, with Feudal Irish preceding my Anglo-Irish army. On the Irish left was all the Heavy Foot, a mixture of Nobles and Galloglaich. All 2 Handed Cutting Weapons. The center is a group of allied Ostmen, Heavy Infantry, but no 2 Handed Weapons, and on his left were the Irish. All Medium Foot, some 2 Handed Weapons, some Javelins.
On the Roman left is the Triarii command, 2 Triarii, 2 Legionnaire , and 3 Skirmishers. Their mission is to keep the flank secure for the center command. They will engage only as needed. The center is 6 Legionnaire units, supported by a single Medium Cavalry. On the left, hidden in two ambushes, is the command of Medium Foot backed by an Elephant.
Deployment:
Here is the plan. At this time the Irish does not know if there is a flank march or not. This should lead to some indecisiveness on turn 1. The Irish line is much wider, and a lot of it has 2 Handed Weapons, effectively negating the Roman Armor advantage. But the Irish line has the 2 Handed Weapons on the flanks, while the Ostmen in the center, do not. My plan is to press the center, and yield to the flanks for as long as possible. This might be possible due to the slower movement rates of the Heavy Infantry. We will see.
 |
| The Roman left is Legionaries to the end, then Triarii for some depth to hold a refused flank. |
 |
| On the right, behind the hill and in the field is the command with the Extraordinarii and the Elephant. |
 |
| Marius's view from the center. The main command of Legionaries is directly across from the Ostmen. The Legions are have a +2 advantage on contact (impact and armor) and +1 for followup (armor) but could be +2 as half or more of the Ostmen should have cohesion hits. |
 |
| The Irish left is a mixture of Javelinmen and Medium Infantry 2 Handed Weapons. They will be facing elite Extraordinarii supported by a Mediocre Elephant. |
 |
| On the Roman right flank, the Irish see, ??? and ???. |
 |
| The Irish left is mostly Nobles and Galloglaich. Heavy Infantry 2 Handed Weapons. The center is 5 units of Ostmen that are just Heavy Infantry. |
Turn 1:
 |
| The Irish right flank rolls 3 command points, but is split into 3 groups. Each group advances normally. |
 |
| The Irish center double-times it, and the left moves only a single march. It is a problem I am all to familiar with running the Irish. At best only average generals, and lots of groups to command. |
 |
| The Roman line also double times it. Skirmishers advance to slow down the Irish right. |
 |
| Ambushes are revealed. An elephant on the hill. |
Turn 2:
 |
The ambushes were a surprise, but with mixed results. The Irish center holds up for the right flank. While the Irish Left flank stops to reevaluate the situation.
|
 |
| The Romans are relying on quality over quantity to win the day. That guy Tactics are for less macho men. |
 |
| The distance between the main lines is over 4 U.D. (160 mm), so there will be no action yet. Worse, the Romans cannot get to charge reach at all. So the Irish will get to chose the range. The Marius decides to step to just within 4 U.D. The Triarii refuse the left flank. |
 |
| The Roman right flank is really the weaker, but faster command. Darrylius will hold the command on the hill for now. |
Turn 3:
 |
| The Irish charge one of the Illyrian Light Cavalry, which of course flees. |
 |
| Only to have it return almost immediately. |
 |
| The Irish lock step forward to within charge reach. |
 |
| Marius orders a general charge of the center command. Their mission is to win this fight. The other commands are dedicated to holding the flanks till that happens. The shock of impact is very favorable to the Romans, winning 4 out of 5 engagements. |
 |
| While not afraid of the Irish, Darrylius's command is fragile. Every turn it is not in contact is a minor victory. |
 |
| The Triarii command is well positioned. The Irish have the advantage of numbers, but they will have to engage them piecemeal. |
Turn 4:
 |
| Seeing the Ostmen falter the Galloglaich charge into the Roman left command. Not to be out done, the Ostmen recover from the early shock of battle and start fighting back. |
 |
| The Irish pile in as well. The combat is indecisive. |
 |
| Marius calls to his legions and they respond. Like dry twigs, Ostmen units break. Their embedded General is now surrounded by Pila and Scutum. |
 |
| On the Roman left, a Triarii is committed to the line. He picks up a pair of hits, the Legion to his right begins to falter. But the remaining Legion shatters his foe and advances. |
 |
| Mixed results continue on the Roman right. the Extraordinarii destroy their opponents but so too are the elephants and the Thureophori |
Turn 5:
 |
| A third Ostmen unit falls. The remaining Ostmen are both flanked and wounded. |
 |
| Irish Nobles run off a Velite, the last Triarii now stands before them. |
 |
| While the Irish position is good on this flank, they are taking heavy casualties. The Illyrian Light Horse sees an opportunity to destroy a Light Foot, and thus an excellent position to harry the Irish rear. |
 |
| The Warband leader of the Ostmen also is destroyed. With him also falls an Irish Kern. |
 |
| Another battle winding down, but not in the Roman's favor. |
 |
| The Illyrians die to a man. Reinforcing the idea that all Roman cavalry sucks. The Triarii are outnumbered and flanked, but hold. Unmarked by a "people pizza" the first Triarii also is destroyed. The Romans haven't lost too many units, but nearly all of them are damaged, their demoralization level is at 19, and they are dangerously close to their break point of 21. |
 |
| An Extraordinarii is flanked and routed. The Roman demoralization level is now 20 of 21. It is a total loss on the right, but the center is a total win. |
At this point, the Roman Army is right at the edge. With 20 out of 21 points towards their demoralization level. But so to the were the Irish, with their demoralization level at 22 of 23. This could be a case of both armies hitting their break points simultaneously. The Roman Generals throw their efforts into encouragement of the troops. And they respond! 3 out of 4 units with 1 cohesion point recover to zero cohesion points, bringing the demoralization point back to 17. Then the engagements of the round took their demoralization back to 19, while one legion flanks a Kern for 1 more point, taking the Irish over the edge.
 |
| At the end of the turn, the Irish have hit their break point. 23 points to Roman 19 |
It was not a great victory. It was barely a victory at all. But it was a fun game. The Roman Gimmick command of 3 Medium Foot backed by an Elephant is a bust. 3 games of 4 that command was routed. So that idea is out. Roman Cavalry continues to prove it is better left at the camp. It gives your opponent less points that way.
Tactically, the Romans do not seem to have a lot of options. Charge in and outlast your opponents. Not real good. Meanwhile their slow speed and does not allow them to react well to flankers, and there will be flankers. Time to put them back in their box for while. What to do next? I am thinking Parthians. Protection 2 cavalry. Good against foot, supported by about 14 Light Horse. And Camels, armored Camels...


