A Headless Body Production
Venue: On Military Matters Book Store, Hopewell, NJ
Event: Preparation for Historicon*
Players: Phil Gardocki running Anglo Saxon
Al Kaplan running Merovingian Franks
Game System: L'Art de la Guerre, 15mm, 200 points per side.
The Forces:
Merovingian Frankish
The names of the commanders is lost to history
12 Tribal Warriors, Heavy Sword, Impetuous, one elite
8 Gallo-Roman Spearmen, Heavy Spear, mediocre
4 Lights, 2 each Javelin and Bow
1 Scouts, Light Cavalry, Bow
2 Cavalry of uncertain type.
Breakpoint around 29
Anglo-Saxon
18 Select Fyrd, Heavy Sword, Impetuous
4 Lights, Bow
2 Lights, Javelin
3 Great Fyrd, Heavy Spear, Mediocre
1 Levy
Breakpoint of 28
Display Conventions: When you see a word bubble like "Ouch!", "Oi!" or "Ahi!", this implies a disorder from missiles. Letters in parenthesis represent some value change for the specific unit. For commanders it is s for strategist, b for Brilliant, c for Competent and o for Ordinary, u for unreliable. For troops it is e for Elite, and m for Mediocre. Other abbreviations, Hvy Heavy, XB Crossbow, LB, Longbow, Jav Javelin, 2HW 2 Handed Weapons, B Bow, Kn Knight, HKn Heavy Knight, HC Heavy Cavalry, Md Medium, Sgt Sergeants, LC Light Cavalry, Chr Chariot, Cat Cataphract, Pa Pavise, LI, Light Infantry, HG Hand Gun, FKn Foot Knight, Hvy Spear, Heavy Spearmen.
"XX" implies a unit killed in that location on that turn.
The Board: The Merovingian Franks win the initiative and elects to attack.
The weather is good.
Dennis Shorthouse is the proprietor of On Military Matters book service. A delightful book store in Hopewell New Jersey that specializes in military books.
Deployment:
It is two weeks after my last visit to OMM, and again I am facing Al with his Merovingian Franks. I was ready for him this time. For one, I looked up how to spell "Merovingian". And I brought an in-period army to face his ravening horde. Anglo Saxon! Any relationship between them and Gauls nee' Germans of 2 weeks previous is strictly coincidental.
It is late in the year, the grass dying back into the dirt, sun baked after a long drought.
 |
| Screw the flavor text. The last battle on the mat was with camels, and we didn't bother to exchange it with a green one. |
 |
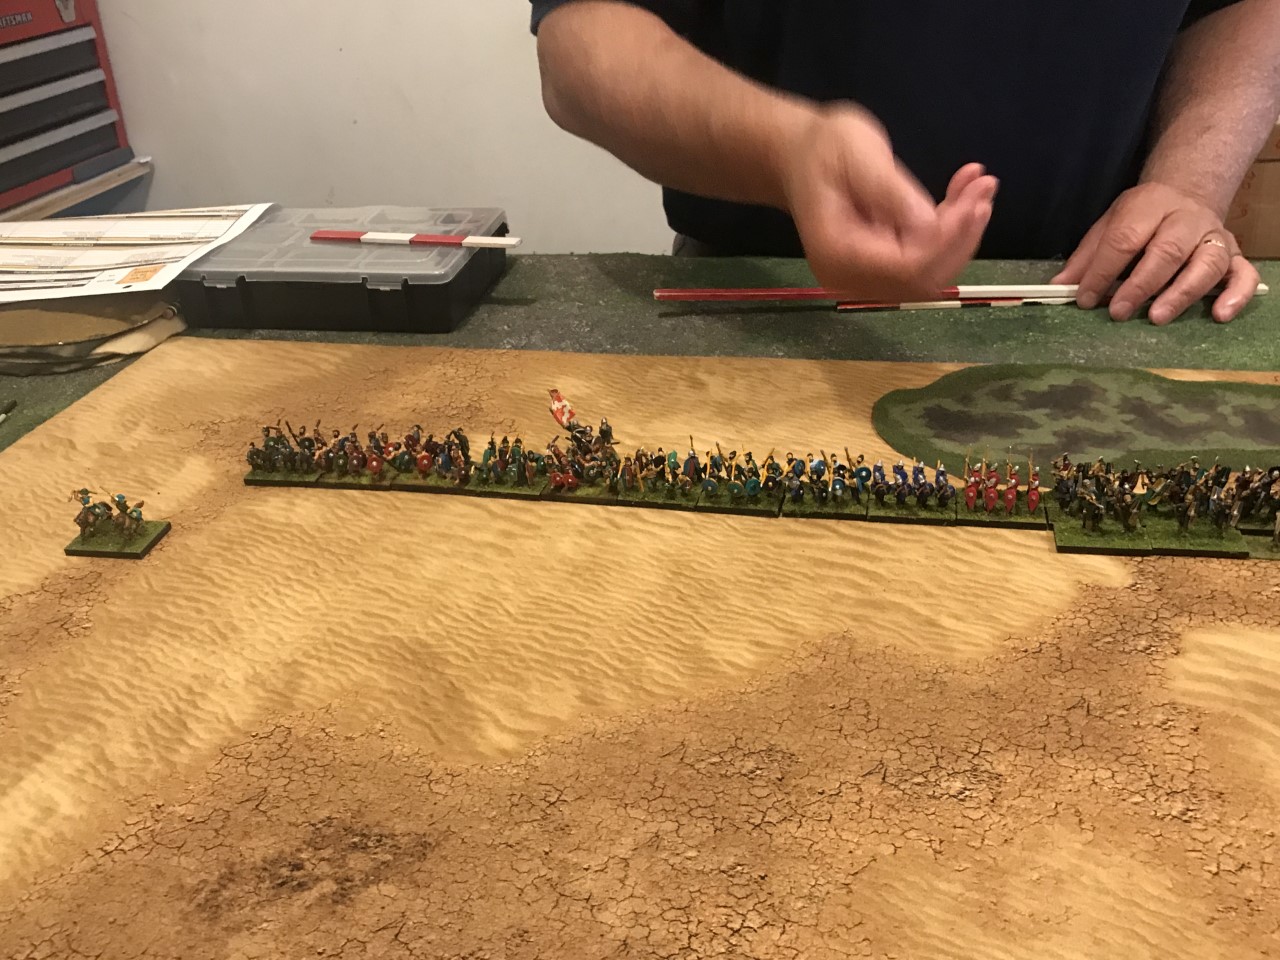
Yadda, yadda, long line of heavy foot.
|
 |
| The Anglo-Saxon's plan is simple. LI in the gully holding the flanks, and wait till the Franks get closer, then charge. |
 |
3 commands, each 6 wide. 18 impetuous foot, just like the Gauls nee' Germans of two weeks ago, but that is just a coincidence ;)
|
Turn 1:
 |
| The Frankish commander is short on command points, and doesn't have enough to advance his light horse. |
 |
His left command has a lot of command points, but is having difficulty with the combination of maneuverability, terrain and extending the line.
|
 |
| The Anglo-Saxons roll a 5 then a 6 for command points, but it doesn't matter. They hold still. |
 |
| But there seems to be a Frankish flank march running. The Great Fyrd is ordered to intercept it. |
Turn 2:
The Frankish unseen command rolls a 5 and will arrive on turn 3.
 |
| Now flush with command points, the Frankish right advances rapidly. |
 |
| The disorganized advance of the Frankish left continues. The flank march is arrive too soon to help. |
 |
| How long have I been playing this game? I moved the Great Fyrd to within the 4UD "Flee the Flank March Zone" Now I have to spend an extra command point I can ill afford to get it out. |
Worse, two of the Select Fyrd units are also in the "Flee disordered" zone.
Turn 3:
 |
| Frankish light horse peek into the gully, and javelins begin to fly. 4 Gallo-Roman spear prepare to invest the gully with overwhelming numbers. |
 |
| The remaining Frankish spear hold back, waiting for the Tribal warriors to catch up. |
 |
| The Frankish horse arrives. It is a small force, but it puts terror into the Select Fyrd's right flank. Unmaneauverable troops, fleeing, and become disordered. Throwing the Anglo-Saxon right flank into disarray |
A total FUBAR on deployment. I thought the right flank was beyond 4UD, but measurement on the turn of arrival said it was at 4UD. There is a price to be paid for carelessness.
 |
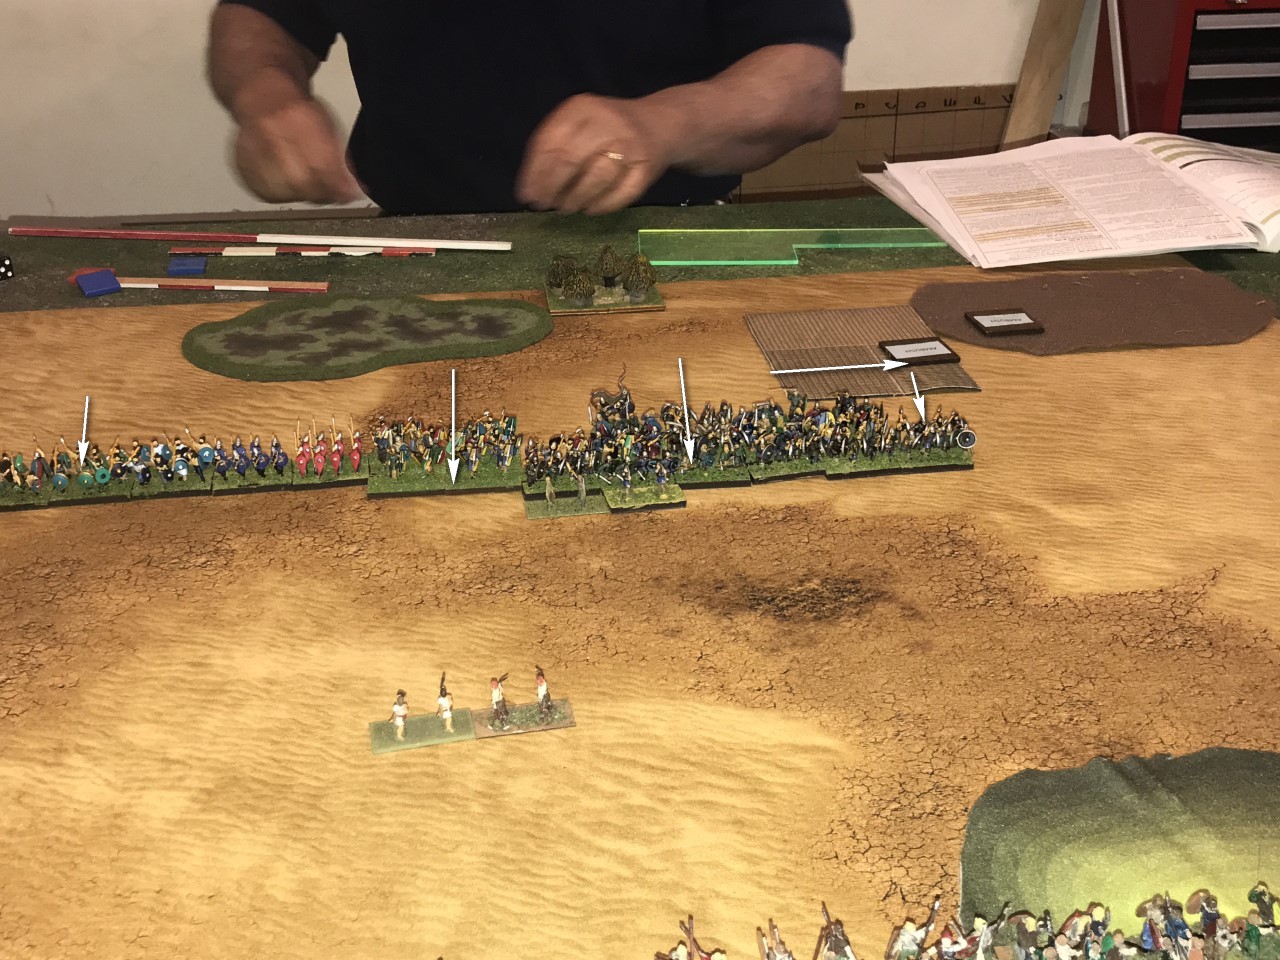
| But the Frankish main line of battle is also in disarray. The Select Fyrd is ordered to advance. |
 |
| The Gallo-Roman Spearmen are a good match up for the Select Fyrd. While the Frankish Tribal Warriors are still trying to line up. |
 |
| But the fools on the hill are scrambling to deal with their own disorder. |
Turn 4:
 |
| A fake charge by the spearmen send a unit of Saxon lights fleeing. |
 |
| And the rest of the Frankish line form up for battle. |
 |
| For all that initial disarray, they arrive with just a tiny notch between left and center. Nothing compared to the fools on the hill. |
 |
| There are only 12 of the 18 Select Fyrd available to charge. But the situation is not going to improve by holding. Even if command points allowed to hold them back. |
 |
| With a great ululation, the Anglo-Saxons charge forth. |
 |
| Winning 7, and losing 4, out of 12 contacts. |
 |
| While the Anglo-Saxon right flank line of battle looks helplessly on. |
Turn 5:
 |
| The Gallo-Roman Spearmen enter the gully, the remainder of their line of battle is rapidly disintegrating. |
 |
| The Frankish Tribal Warriors are made of tougher stuff, but their line is wearing thin as well. |
 |
| Their far left line has a charge opportunity, and they take it. Flanking and destroying a Fyrd on contact. |
 |
| The indecisive battle for the gully continues. Maybe the Gallo-Romans are going there to find refuge? The last couple spearmen outside the gully are flanked or disordered. |
Of course, indecisive in this case, is what the Anglo Saxon's want.
 |
| The Frankish Tribal warriors are flanked, but they have one last reserve to throw in. |
 |
| The Fyrd on the hill finally get their chance to charge. |
 |
| A count of the mayhem. The Franks are at 24 of 29. |
 |
| The Anglo-Saxons are at 16 of 28. |
Turn 6:
 |
| The Frankish light horse has so far managed to avoid all attempts to shoot it away. And realizing that the Franks are only 5 away from demoralization, it takes up a spot behind the Anglo-Saxon light infantry. |
But from the Gully, the Gallo-Roman Spearmen charge! Hitting the "Great Fyrd" in the flank. The odds were not that bad for the Great Fyrd. Zero for being flank charged, to zero (+1 weapon, +1 flank, -2 for being in the Gully) Both mediocre. So an even up battle, and the Great Fyrd stand!
But, by being attacked, the Great Fyrd no longer has a ZOC, allowing another Gallo-Roman Spearmen to flank charge a Select Fyrd flank.
 |
| In the center, the arrival of the fresh, and elite Franks interfere with the rolling up of their flank by the Anglo-Saxons. On the other side of the line, it is the Franks rolling up the Anglo-Saxon flank. | | |
 |
| Tactically, the Frankish horse has turned the flank on the hill. But on the hill itself, the Franks are losing. |
 |
| A charge by a Select Fyrd on the only elite on the board goes poorly, taking 2 hits. |
 |
| Fyrd charge off the hill, flank charging a Tribal warband, and taking away all hopes of destroying the Anglo-Saxon center line of battle. |
 |
| For a large barbarian army to win, it has to be willing to accept losses to gain more wins. 5 points is still a lot to get. So the Anglo-Saxon Lights commit to battle. |
And a lucky 6-1 roll which offed another Gallo-Roman spear.
Taking the final score of 29 for the Merovingian Frankish to 16 for the Anglo-Saxon.
What went wrong? Always measure your units close to the 4 UD edge. In my case, the error occurred next to the gully. The unit there wasn't flush with the gully, about 4mm off, and then down the line of 17 foot units, put the right side over the 4UD line. While not a legal deployment, but by turn 3, not fixable either, so I paid a penalty of 2 units fleeing disordered.
The command structure of 6 Select (heavy sword, impetuous) and 1 Great (heavy spear, mediocre) works well. The Great Fyrd on both the left and the right were able to hold the flankers at bay for a while, giving the Select Fyrd time to do their work. The Great Fyrd in the center was less useful. It needed to plug a hole, but was never go to the position to do so.
And the levy, which didn't get it's wake up call and was never deployed, protected the camp with panache'.
*Theme, Western Europe and their Enemies**: All armies must be between the years 500-999 AD
list
109, 124-133, 141-165. Legal allies may be outside those list #s, but
must fall within year range. Options indicating Europe, North Africa are
permitted. No others.
**(No Elephants, No Knights, Maximum 2 Cataphracts in army)
For more information go to the American ADLG Forum.