A Headless Body Production
Location: Phil's House
Event: Sunday afternoon without football
Players: Philip Gardocki playing Llywelyn ap Iorwerth, Prince of Gwynedd and North Wales
Bruce Potter playing Alfred the Great , Elf counsel, King of Wessex
Preamble: The Welsh raids are growing ever bolder can no longer be tolerated. On the plains of Salisbury, in the shadows of the holy ring of stones, King Alfred musters a mighty army. But Llywelyn ap Iorwerth was not going to wait for a retaliatory strike, and steals the march and attacks first!
Game System: L'Art de la Guerre, about 400 points per side.
Scenario: We have a long afternoon, the Eagles game doesn't start till 8:20 tonight, so Bruce and I are playing "Dump the Box".
The Forces:
Prince Llywelyn ap Iorwerth, Daryn, Daryn and Dafydd, all competent commanders.
29 Welsh Warriors, Medium Swordsmen
6 Alecotti from the north, Medium Swordsmen, impetuous (elite)
9 Small boys, Light Infantry Javelin
10 Mounted Warriors, Medium Cavalry (9 elite)
Break point 54
King Alfred, The Great Strategist, Prince Wilfred the Competent, Prince Ethelred the Competent and Prince Anglered the Competent.
6 Hirdsmen, Heavy Spearmen, Armor (elite)
24 Great Fyrd, Heavy Spearmen
4 Lesser Fyrd, Heavy Spearmen (mediocre)
4 British Vassals, Medium Cavalry
2 Mounted Hirdsman, Heavy Cavalry (elite)
8 Light Infantry Bow and Javelin
Break point 48
Deployment:
King Alfred wins the initiative, and looks to attack, but sees the choice of terrain available to the Welsh is just woods and mountains. He decides that thought was just too awful for words and elects to defend in the plains.
 |
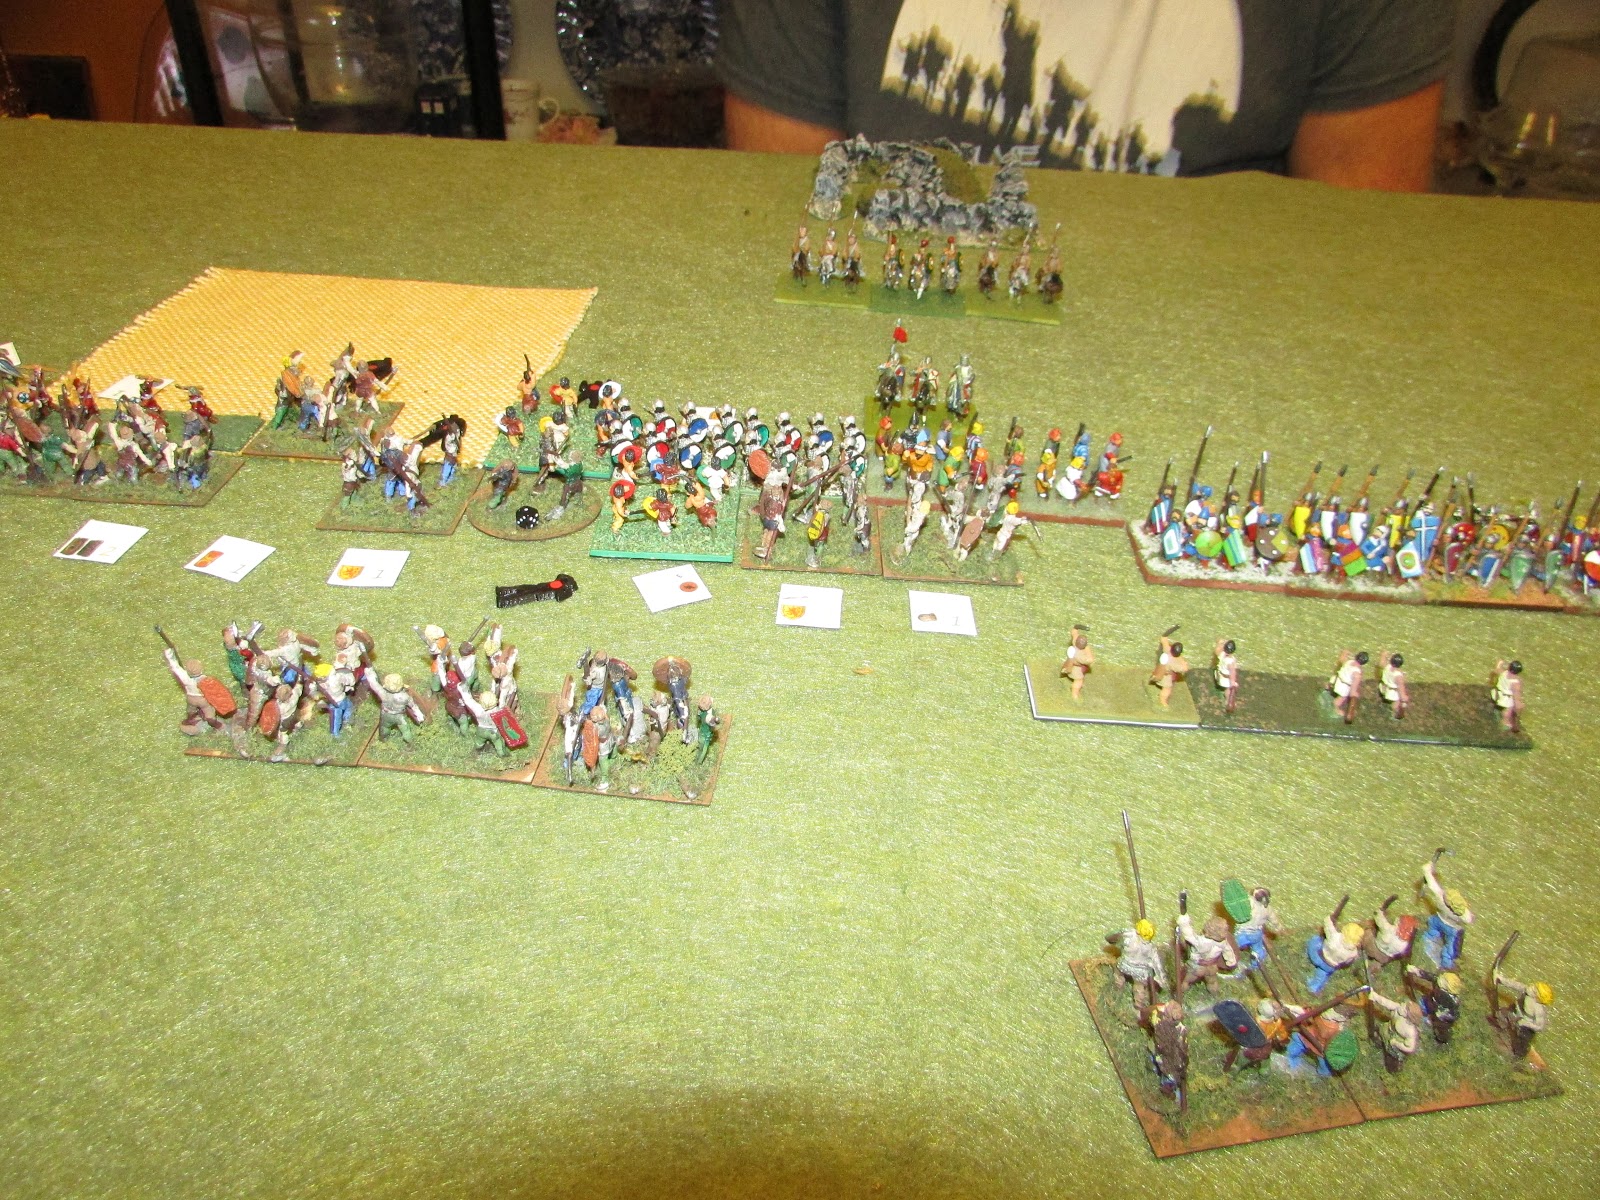
| Salisbury Plains west, Tuesday, about time for elevenses |
 |
| Salisbury Plains east, same Tuesday. |
 |
| The official military observer from Howandaland takes is position on the high ground. |
 |
| Llwelyn Ap Iorwerth assembles his warriors in a double deep formation. The thought is the first line was expendable, and the second will carry the day. |
 |
| Daryn duplicates is Princes position. |
 |
| As will the other Welsh Commander Daryn. |
The double deep formations seemed like a good idea at the time, but looking at the width of the Anglo-Saxon line, all heavy foot, extending from board edge to board edge, it seems I am just yielding flank support advantages all down the line.
Turn 1:
 |
| To compensate for the shortness in his line, Llywelyn splits his group in two. The first line shifts right, the second line shifts left. |
 |
| Daryn advances and shifts right. His goal is to engage the Saxons next to the field. The Saxon command on the left cannot interfere because of the field and Llywelyn's command. |
 |
| Originally, Daryn's command on the right was just to support Daryn's command in the center. To lure the Saxons upon him, and open up the flank for the on coming cavalry. But seeing the deployment now, he has to organize a hasty rescue operation. |
 |
| For Alfred accurately guessed that Llywelyn would have a flank march, and he guessed correctly on the flank it would be running on. A whole corps of heavy foot spear are position to greet the Welsh cavalry. |
King Alfred was satisfied with his deployment, and only made minor adjustments to his line. Which brings us to ...
Turn 2:
Dafydd's cavalry command rolls a 6 and will be arriving next turn.
 |
| Llywelyn continues expanding his line. Which means he will have neither the depth or length advantage when it makes contact. |
 |
| As originally planned, Daryn's line separates to provide rout paths for the first line. |
 |
| Daryn's line races to support Dafydd's command, but it is already too late. |
 |
| Prince Wilfred expands his line even further. |
 |
| King Alfred reveals his ambush. Light infantry in the fields. While an annoyance, it means Daryn will not have an overlap advantage he sought. |
 |
| Unconcerned with the events to the west, Princes Ethelred and Anglered recall their lights, but otherwise maintain their position. |
 |
| It is time to rethink Dafydd's arrival plans. |
Turn 3:
 |
| In preparation for his assault, Llywelyn separates his lines. |
 |
| With the Alecotti leading the way, Daryn launches the attack on the Saxon line. Shockingly, the light infantry not only holds the Saxon right, but even wins one. But the Alecotti make up for it with two wins with great die rolls and furious charge, causing a pair of 3 hits. |
 |
| The other Daryn approaches the line, but the defending princes are not showing any interest. Dafydd's horse arrives. He could have come on safely in the Welsh rear area, but this is a friendly game, so we are going to mix it up. |
 |
| Prince Wilfred decides to leave the comfort of his lines and approach Llywelyn's line. |
 |
| The scrum in the center continues. A Saxon light is destroyed, but elsewhere it is the Welsh that are cracking. |
 |
| The Saxon princes react to the arrival of the Welsh horse to protect the gaps from the flank attacks. |
 |
| There was a potential for the Welsh to pick up points among the Saxon lights, but not any more. |
Turn 4:
Time for major pushing and shoving.
 |
| With a wild ululation, the Alecotti charge forward, winning both their fights. |
 |
| The Saxon center has lost 3 units and has been penetrated. |
 |
| On the Welsh right, pressure is now being applied. On this flank, fortune is favoring the Saxons. |
 |
| Dafydd is hoping that a flank will open for the Welsh horse to take advantage of. |
 |
| At the bottom of the turn, the Alecotti continue their rampage on the left. |
 |
| In the center, the fight continues but with no change in status. |
 |
| On the right, the Welsh line is turned, and the front line is weakening. |
 |
| On the far right, Saxon spear charges in masse. A cavalry unit is destroyed, the rest still stand. |
Turn 5:
 |
| Welsh second line advances into combat. The Alecotti, despite having flank charges available, do not have enough command points to do so. |
 |
| In the center is the same problem. Opportunities exist, but with limited command points, priorities must be made. For instance, there was a flank charge made next to the field. But a charge on the lights in the field had to be shelved for now. Alecotti could make a flank charge as well, but that costs two command points, and exposes them to a cavalry charge. |
 |
| On the right, Welsh reserves are being committed. |
 |
| The official military observer from Howandalad takes in the sites. |
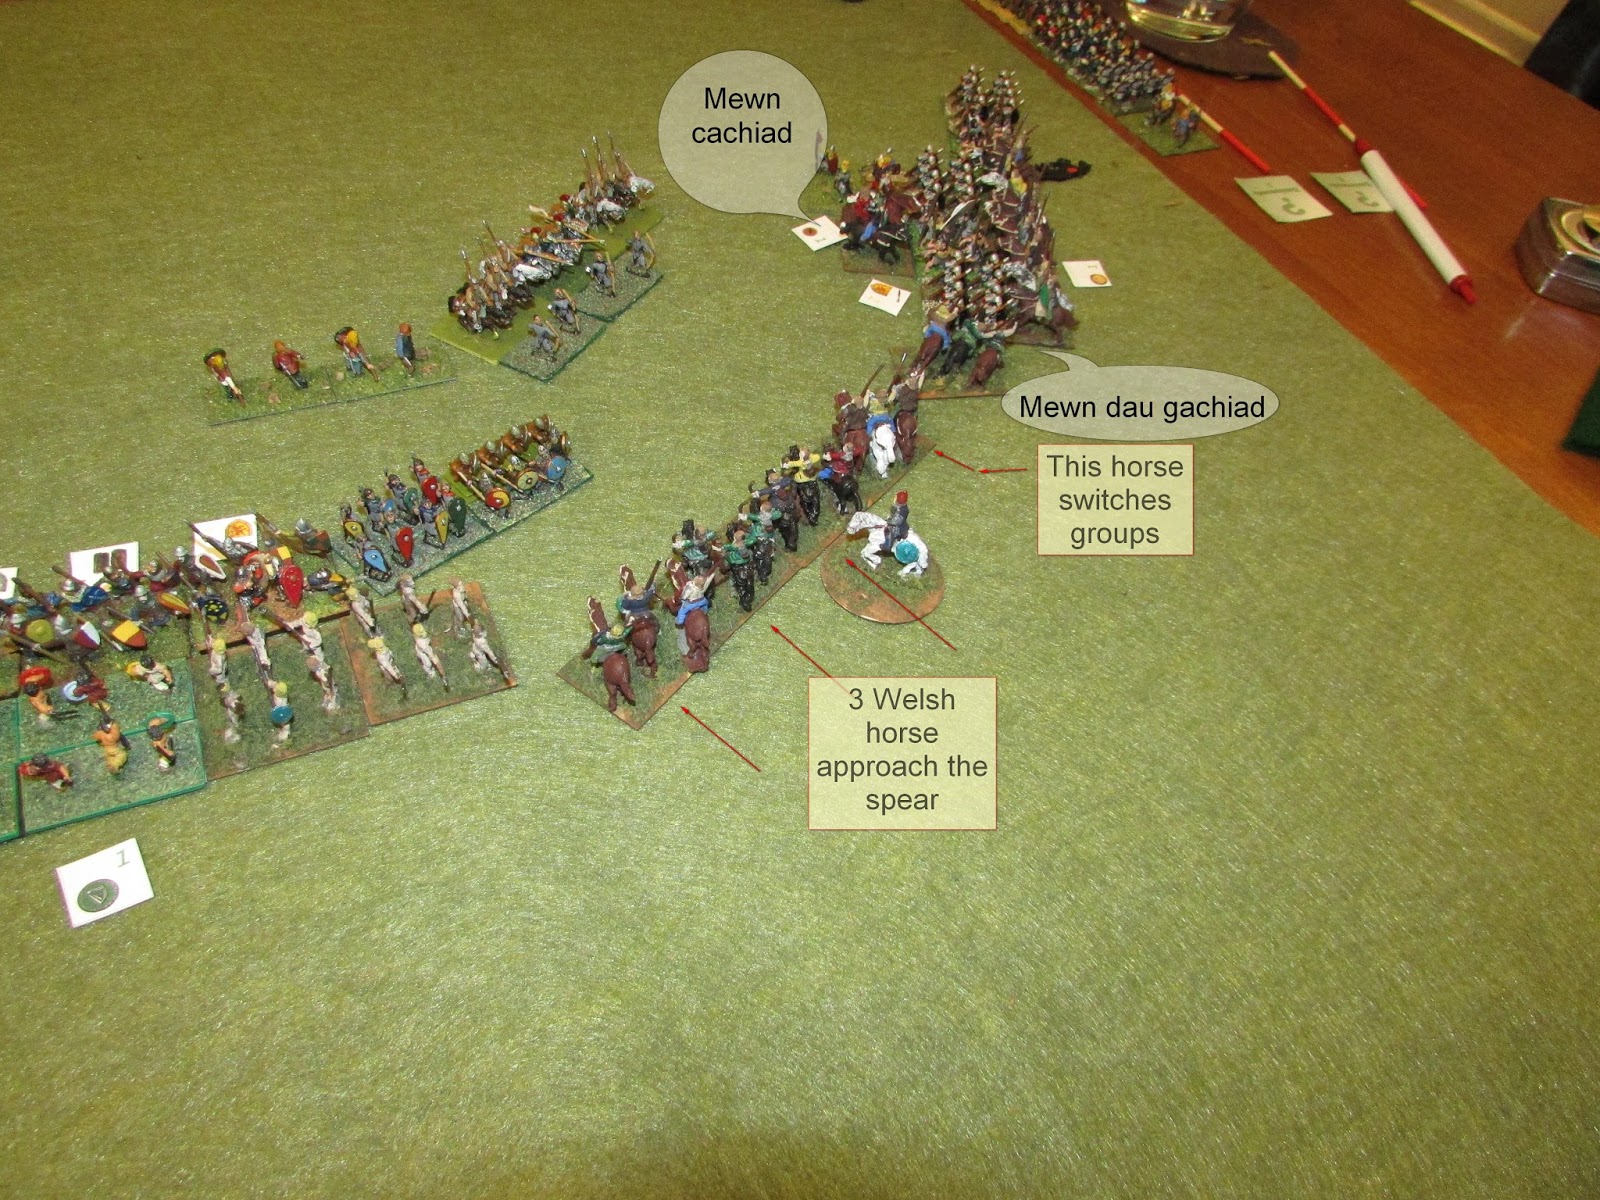
Dafydd rolls a 5 for 3 command points. He puts them to good use.
This maneuver is a bit hard to see in 15's.
The view from last turn:
 |
| 3 troops of Welsh horse find themselves way behind the Saxon line of foot. 3 Saxon horse are in a position to charge the Welsh, but the Welsh are not ZOC'd. |
 |
| So, the Welsh horse goes for it! |
The Welsh are 17 points towards their demoralization level of 54.
The Anglo-Saxons are 23 points towards their demoralization level of 48.
While the Welsh have the advantage, the advantage of the Saxons is their durability. Many Welsh units are at 2 points, and in danger of destruction.
Turn 6:
 |
| Saxon Infantry finally catch up with the combat line. Gaining both length and depth. But Welsh luck proves better and it is the Saxon foot that take the hits. |
 |
| Saxon cavalry charge! One Alecotti is run down, the other holds. |
 |
| Command control dice have been running low on both sides, and many Saxon foot remain out of combat. |
 |
| Saxon Cavalry charge! They catch one Welsh horse in the rear, and one in the flank! |
 |
| And again, the dice gods smile on the Welsh, as the Welsh horse win 2 of the 3 charges. |
The Welsh are 25 points towards their demoralization level of 54.
The Anglo-Saxons are 30 points towards their demoralization level of 48.
Turn 7:
 |
| As the shadows loom the combat devolves into a brawl. |
 |
| Ditto the center. The Welsh have troops to add, but no space to put them. Or command points to prompt them. |
 |
| More of the same. You might as well go to the end turn synopsis. |
 |
| 400 points, you gotta love it. |
 |
| 4x6 table (that's feet for all you metric people) |
 |
| Bruce encouraged me to take a side shot. It looks pretty good. |
 |
| There are many breaks in the Saxon lines, but little the Welsh troops can do to take advantage of it. |
 |
| The Saxon center was broken as well, but well placed Saxon horse have stabilized the situation. The original Welsh reserves have been mostly sent elsewhere to bolster the flanks. The remaining reserves lack for orders. |
 |
| In retrospect, and command points spent on getting the light foot more out of the way was not well spent. |
 |
| And another breakthrough the Saxon lines. |
 |
| Final shot. I expected bringing the Welsh horse in to confront the spear would be a disaster. I had hoped the cost would be worth it to make other things happen. In the end it wasn't too bad. 6 of the Welsh medium cavalry still stand. |
The Welsh are 34 points towards their demoralization level of 54.
The Anglo-Saxons are 50 points towards their demoralization level of 48. The Welsh have won the game!
This was our first 400 point game, and it really stresses the lack of command control. Which I regard as a good thing. To have things you can do "if only" you had the points. Otherwise, this took about 5.5 hours to run, from rolling out the mat to out the door after cleanup.
Why did the Welsh win? I think it is down to early luck here. The Welsh did take advantage of some off the line skews that gave them a flank, but that is not enough to account for the magnitude of the victory. Same with the Alecotti, with Impact and furious charge, they had a slight edge initially, but should have worn away to the 4-3 advantage that is Heavy vs. Mediums. But most of them survived till the end game.