Friday, February 16, 2018

Another Crusader Recruitment Drive

A Headless Body Production

Location:  Allen Kaplan's Man Cave
Event:        Quick throw together.
Players:     Philip Gardocki playing Welsh
                      Allen Kaplan playing Later Crusaders

Game System: L'Art de la Guerre, about 200 points per side.
Scenario:  It's time for another futile crusade against the infidels in the east.  Recruiting is proving difficult after the disasters of the previous 4 failed attempts, so the volunteers are being sought in areas that haven't heard of, or even care about the Pope's call to liberate the holy lands. 

The Forces:
The Welsh are lead by the Princes Llywelyn, Daryn, Daryn, all competent commanders.
 
     10 Welsh Warriors, Medium Spearmen
       1 Foot Knight (elite)
       2 Billmen, Heavy Swordsmen, 2HW(mediocre)
       3 Small boys, Light Infantry Javelin
       3 Welsh Horsemen, Medium Cavalry, impetuous 
       6 Longbowmen
       1 Light Horse, Impact
       Break point 26

The Later Crusaders have A brilliant Chief Recruiter, and 2 secondary recruiters, one competent, and one ordinary.


      1 Heavy Cavalry, Impact

     4 Medium Knights, some impetuous.   
    12 or so heavy foot, some mixed spear and crossbow.
     2 Light Horse
Break point 20 

Deployment:
The Welsh win the initiative and elect to receive in the mountains.  They select 3 steep hills and a woods.  The Crusaders select a road and a field.  After the dice are thrown, the woods was removed.

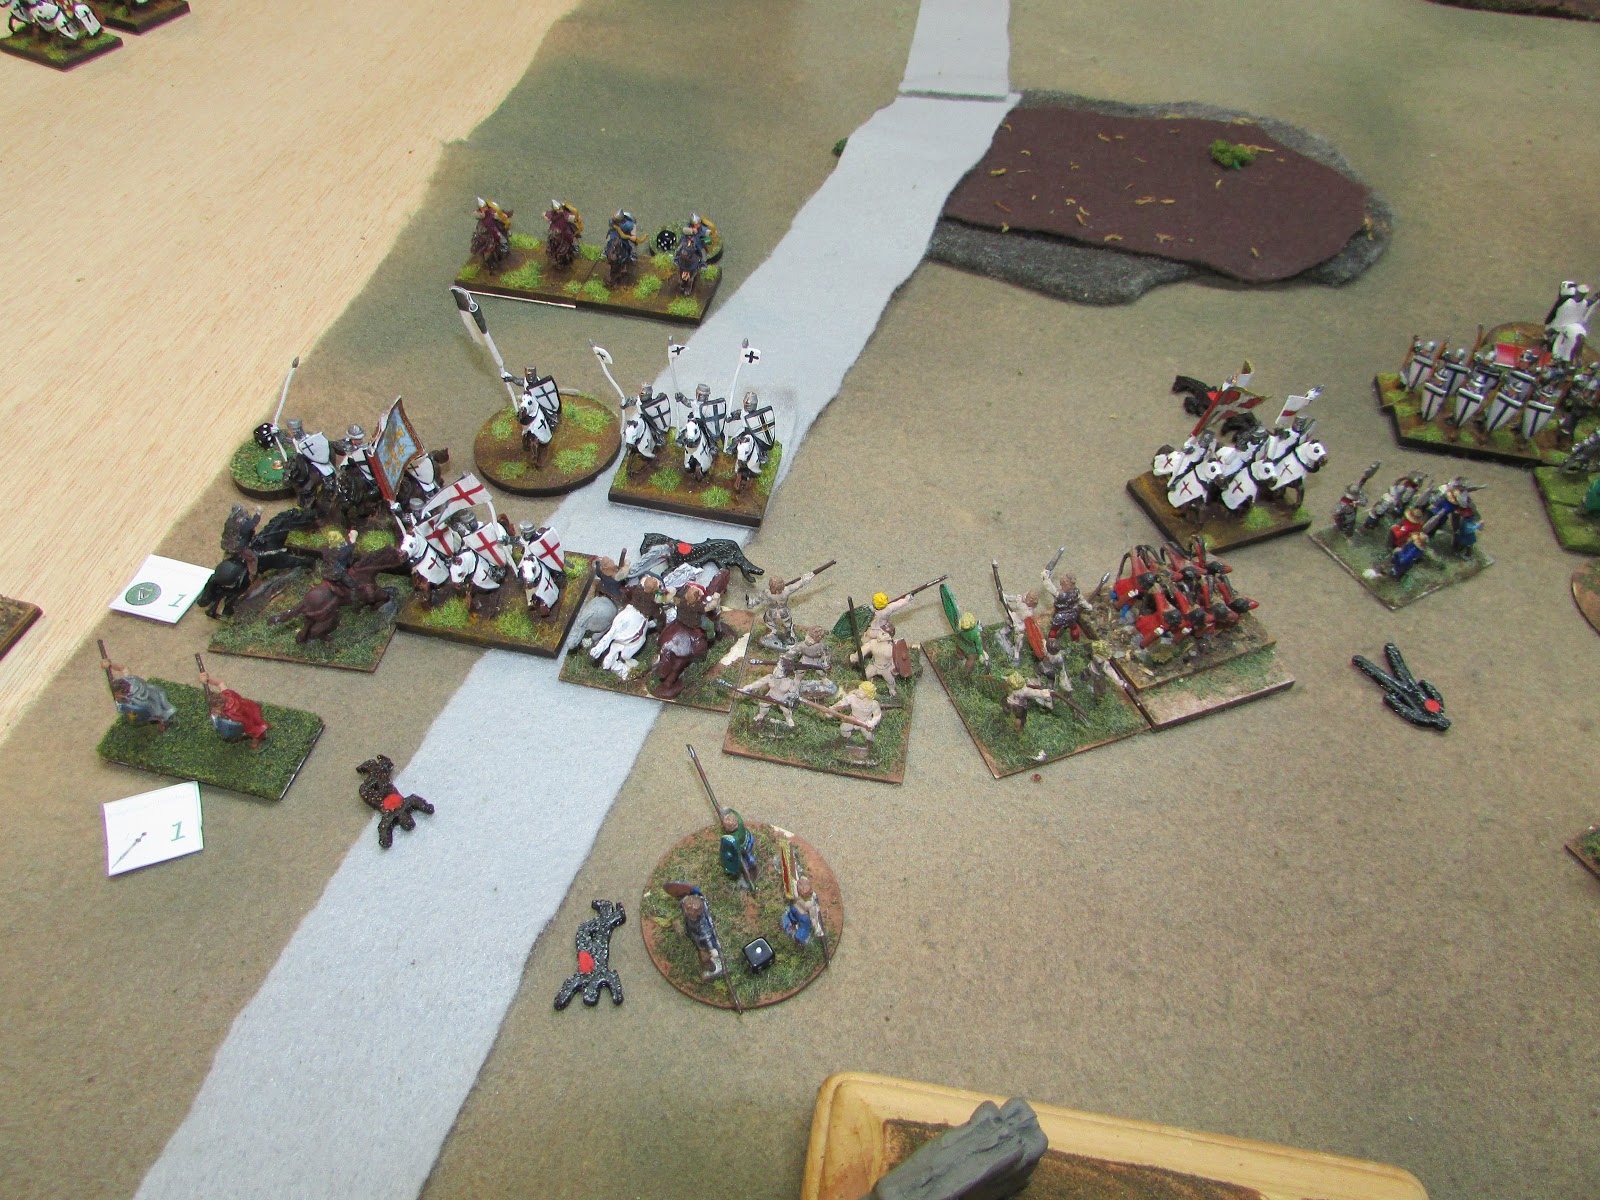
The Crusader knights deploy on the road with their single heavy cavalry in the vanguard.  The Welsh deploy with a strong left and center.
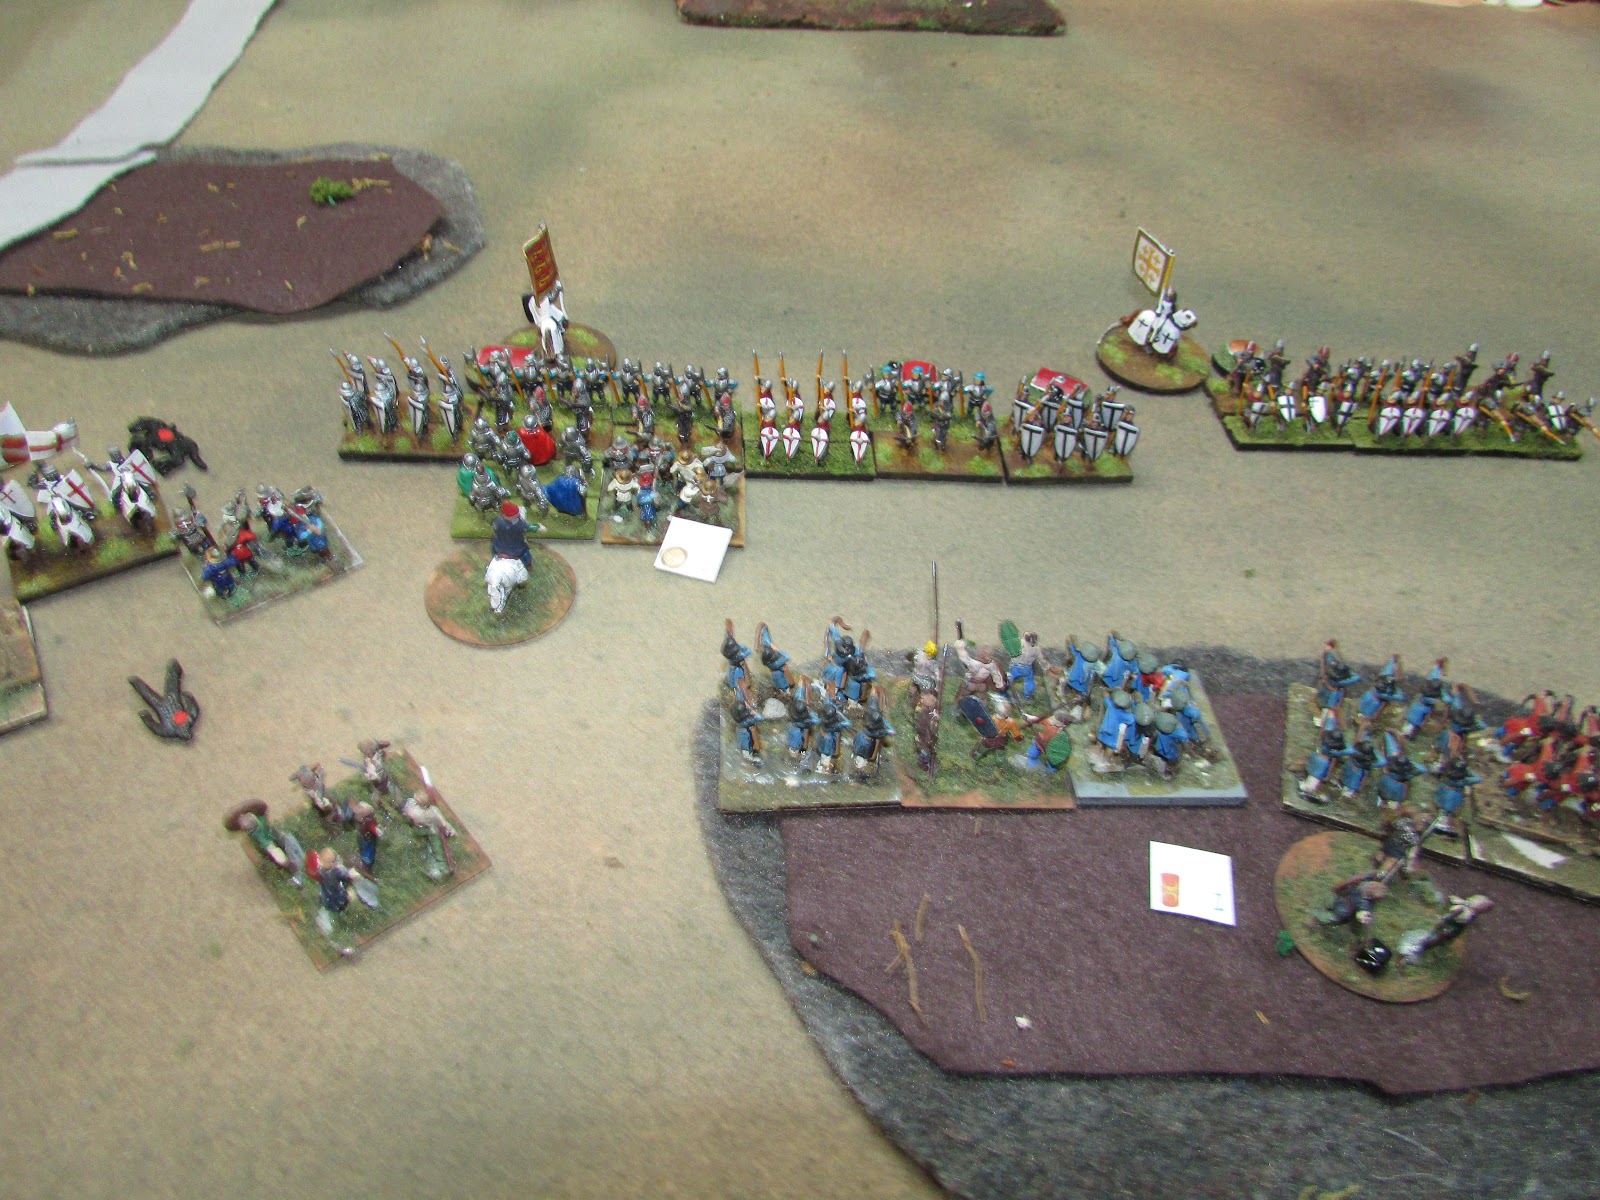
The rest of the Crusader line is just down the line.  The Welsh line continues along Bryn Rholben, with other troops hiding behind.

With the sun rapidly crossing out of view, better pictures will soon to be had.
 Turn 1:
The Crusader commander advances as fast as he can, but his knights are still in a traffic hill along the steep slopes of  Ysgyryd Fawr.  The first traffic jam on the A465!

The supporting infantry advance nearly as fast as the knights.
With 4 command points,the second infantry command manages a triple move.
The Welsh lights advance and trade shots. 
The Longbow advance and snipe at the lead knights.
Daryn's command holds fast.

The other commander Daryn reveals his ambush, four more units.  2 Longbowmen ascend the hill and begin to shoot the Crusader lights.
 Turn 2:
The Crusader knights try to spread out.  Llywelyn's forces are bent favorably and continue to score missile hits.
Crusader foot continue their slow advance. 

The other Crusader foot command split their forces and advance as well.

Daryn advances his heavy infantry to cover Llywelyn's flanks.  His mediums command the slopes of Rholben hill.

Crusader Crossbow proves very effective.
Turn 3:
Up until the end of turn 2, the missile exchanged was entirely in the favor of the Welsh.  6 hits distributed down the Crusader line.  But a flurry of 1's against the crossbow caused a number of hits bringing this to a tie game at 6 hits each.

Crusader knights charge all down the lines.  Winning every exchange, they pursue, hacking and slaying where they will.  The only victory was the Welsh light horse (impact) wins it's fight against Crusader heavy cavalry.

The Crusader foot is ready to follow up their knights.
On the right, more arrows and bolts are let fly.
Welsh counter attack.  One knight is charged frontally and on the flank and destroyed.  Another is struck by Billmen, and has a very unfavorable die roll, and is destroyed as well. 
Daryn prods his foot knights forward, supported only by solitary billmen unit.  He would have liked to have brought in more troops, but limited command points would not allow, so his remaining forces continue to stand on the hill.


The other commander Daryn, waxing eloquent and with an excellent set of rally rolls, fully restores the faith of his forces.
Turn 4:

The Knights are not dissuaded from their casualties and continue to attack.  By barest luck does the Welsh Horse avoid destruction.
Losses mount on both sides in the center.
On the Welsh right, meh....
Crusader Knights rack up many points with the total destruction of 3 Welsh units.  The Welsh mass up to try to overwhelm a single knight, but fail to cause any harm.

The same in the center.  Billmen hang on with the help of supporting warriors.  Welsh mercenary foot knights, fresh from destroying a unit of Crusader spear, "conforms" and continues to ravage the Crusader line.  Welsh longbow, keep up the pressure in pinging the vulnerable hanging edge of the Crusader center positions.

Both sides are playing this flank cagey.  The Daryn is exploring the flank looking for an advantage.
Turn 5:
What to do with a badly damaged Heavy Cavalry unit?  Race for the enemy camp.

The captains of the Crusaders are sensing a win, but need to pursue a few points somewhere.  And so, the disordered spear are pushed forward to the hill.
On the right, Crusader crossbow continue to be effective.
Another Welsh warrior is run to the ground by Crusader Knights.  But another knight is flanked by Welsh bowmen,  Better still a Crusader Knight is destroyed by the Billmen, and a Heavy Spearmen is also destroyed by the mercenary foot knights.
Welsh troops race off the hill and engage a single spear unit.  If the bowmen survive, there will be several flank charges next turn upon the Crusaders.

The other Commander Daryn seems to have lost interest here.
Turn 6:
Despite flanks and losses, the Crusader Knights have won the flank, and with that, the game.

It was won in a timely fashion, as the Crusader center was in risk of total collapse. 
On the last turn, the fight was engaged on the Welsh right.  The results were 1-0 and too late to change anything anyway.

It is a win for the Crusader Knights!

At first, this game looked very favorable for the Welsh.  The Crusader Knights were bunched up on a steep hill, and were taking bow fire, disordering the first three units coming off the hill.  Once engaged, the results were fairly mixed, which should have been to the advantage of the more numerous Welsh.  But quality won through.  Knights began picking up medium foot, and racking up points.  The Welsh could have done better, but their commanders were only competent, and often lacked the command points for decisive moves.  Many times the action was down to deciding on which flank attack to make.  Command points only allowing one.

The center went fairly well.  The Welsh foot knights killing two enemy units by themselves, and the Billmen, even though only mediocre, fought continuously and scored a kill as well.

But losing the camp proved decisive, just pushing the Welsh over the edge into retreat.  It was a good game.


Saturday, February 10, 2018

Burma Has Fallen

A Headless Body Production

Venue:   Huzzah Hobbies, Ashburn, VA.
Event:    L' Art de la Guerre Team Tournament.
Round:  3, Medieval Period.
Players: Phil Gardocki (Team Jersey Boys) running Burmese
                  Marc Crotteau (Team Beltway Bandits) Mongol
                 
Game System: L' Art de la Guerre, 15mm, 200 points


Big praises for Huzzah Hobbies.  Their staff excellently handled our unreasonable demands with both panache and grace.   They provided a clean, large gaming area sufficient for out 48 players AND a large number of Magic, the Gathering players.  Well Done!

The Forces:
The Burmese, led by the Kings Narathihapate, King Pagan of Bassein and King Pagan of Thaton, all Competent.
      5 Elite Elephants
      4 Medium Spearmen
      5 Bowmen
      2 Elite Medium Swordsmen, 2HW
      4 Light Infantry, Bow
      1 Elite Light Infantry, Firearm
Breakpoint...22 

Genghis Khan is a master of subtlety and obfuscation.  I am not even sure which Mongol army is being run, let alone the troop types.  Assume mostly Elite Medium Cavalry Bow, and some Heavies with impact.  Surprising few lights though.  At this point the break point seems to be 20.

Anyone that has read my Anglo-Irish battle reports knows of my running joke of naming my generals Larry, Darryl and Darryl.  So too, the Kings Pagan and Pagan.  But it is not entirely a joke. Using Wikipedia as a sole source.  Burma had a number of kingdoms, some were merely city-states, but the name Pagan was a common royalty name.  I can't say they took to the field together, but the possibility existed. 

The Board:
The Mongols have won the initiative, there is no surprise there, and elect to attack the the Burmese in the mountains, which is a surprise.  The Burmese select two steep hills a brush and a gully.  The Mongols a steep hill and a road.  After the dice were rolled, the gully was filled in.  Both sides have a steep hill in their center deployment zone, and another steep hill dominates the Mongol right.

Deployment
The Mongols split their commands into 3 parts, well separated by distance and terrain.    That gives them maximum flexibility.  And with 3 brilliant or better generals, and mostly mounted forces, they can take advantage of that.

The Burmese decide to fight only on the left side of the board.  Using their smaller command as flank guard, and another steep hill as a base.  Most of their forces are occupy about 50% of the board, with little danger of being flanked.


Lets just get the elephant in the room over with, at least not the obvious ones :)  This is the Mongol camp.

On the Mongol right, a small command of 5 units.

In the center is the main horde 8 units.

On the their left, 7 more units of foot.

But King Narathihapate isn't going to play on that side of the board.  Let the Mongols redeploy.

Because there is this steep hill in the center of the board that he is going to hang his flank on.

Leaving enough on the right to keep the attention of Subedei's forces.
Turn 1:

The Mongols slide to the right and advance.  Genghis sends his forces around the hill to join them.

In doing so, Splits his forces

Subedei double times his lights, but his mediums move cautiously.
There is a problem.  The Burmese still have a gap on their left, its wide enough for the agile Mongols to take advantage of it.  But King Narathihapate has allowed for this, and has a spear unit in reserve.  All he needs to close the gap is to not roll a one.

And there it is.

King Narathihapate now has a decision to make.  He sees an opportunity to pin some of the Mongol pony's against the hill, if he is bold.  OR he can close that hole on his left flank. He throws caution to the wind and advances.

King Pagan advances with him.  An ambush is revealed on the hill to be more spearmen.

On the right, King Pagan reveals his ambush.  Should Subedei try to slide by the hill, it will have to either swing wide, or risk arrow fire.
Turn 2:
The Mongols are also bold.  They flow through the gap like water, and engage the Burmese spearmen flank position.

Genghis sees the trap offered to him, and decides not to risk shooting the gap, and withdraws his cavalry but 1.  The Burmese are in a near perfect line, and he is going for the other flank.

Subedei assesses his options, and advances slowly.
On the flank, the melee is in full swing.  The Burmese flank guards have paid the price for their inability to cover the gap and take two hits in successive missile shots.  Their brother spearmen, adjacent to their elephant, roll well, and damage their Mongol opponent.  Burmese Bowmen turn the Mongol flank, and in doing so, shoot and scatter the Mongol light foot.  The remaining pony from Genghis's command is charged by an elephant, lead by the great King Narathihapate himself.  But fortune favored the Mongol tribal leader as they were not obliterated on contact.

King Pagan wheels his ponderous line, keeping his flank protected.  His archers reach out to shoot, but their arrows find no targets.
Nothing to see here.
Turn 3:
The Mongols are doing what they do best.  Turning the flank and maneuver
But King Narathihapate is not without his own tricks.  Mongol ponies are also flanked, and two are destroyed.
Burmese archers have found their range and are scoring hits.

Subedei has decided that break time is over and approaches.  Mongol archery proves accurate.
The Mongols are 13 points towards their break point of 20.
The Burmese are 12 points towards their break point of 22.

Turn 4:
Give the Mongols points for hutzpah.  A pony conforms to an elephant, with support, and scores a hit.  Their other pony, which was flanked, defeats it's spearman opponent,and conforms to the flanking tormentor.

Sorry for the blurry shot.  Shooting a gap between the elephants, the Mongols charge the bowmen destroying both.

Subedei is content to shoot it out.  The score here is 2-1, Mongol

This side is winding down,if only because of a lack of units.
So to, the center. 

Subedei now has 3-1 in his favor.  He'll call that a win.  (because it is!)
The Mongols are 15 points towards their break point of 20.
The Burmese are 18 points towards their break point of 22.

Turn 6:

Fatigue? Lost film?  Lens cap?  I don't have the finale pictures!

On the Burmese left, another Mongol pony were picked up, an elephant in front, and a bowmen on the flank will do that.  In the center, the Mongol's hold their own against the elephant, but pick up a Spearman.  On the right, Subedei picked his moment, and charged, destroying one guardsman, damaging another for 2 more points and the win!  The score was 22 - 17.

My attempt to exploit the Mongol command separation almost worked.  It did partially, but Marc was able to take advantage of Mongol agility and extricate most of the trapped units.  His patience on the far right in the end lead to the final victory.  He have his bow fire time to work, so when he did charge the Elephant supported guards, they could do so with good effect to gain the final points he needed to win.