A Headless Body Production
Venue: An Undisclosed Basement
Event: Playing a game for the camera
Players: Phil Gardocki running Samurai
Tom Worden running Anglo Irish
Game System: L'Art de la Guerre, 15mm, 200 points per side.
So there was a comment made to my last battle report, the Battle of Emesa from Tommy Worden, "...would you be up for a remote game of ADLG at some point via WhatsApp?" I have no idea what is up with WhatsApp, but have played a couple virtual games on Table Top Simulator, so why not? We go back and forth with the lists, and settle on Tom playing Anglo-Irish, and me Samurai.
Tom lives in Ireland, so basically, my phone was used to live stream the board, across the Trans-Atlantic cable. Pretty cool, huh?
The Forces:
Samurai (list 210)
The Samurai are commanded by Larry-San, the Competent, his brother Darryl-San the Brilliant and his other brother Darryl-San, the Ordinary and unreliable.
7 Samurai, Medium Swordsmen, Bow, 5 of which are Elite
4 Yari, Medium Spearmen, Mediocre
6 Mounted Samurai, Heavy Cavalry, Bow, 2 of which are Elite
4 Bowmen, Pavise, Mediocre
Breakpoint of 21
Anglo Irish
Commanded by Larry, Included and Ordinary, his brother Darrel the Competent, and his other brother Darrel, also Competent.
2 Heavy Knights, Impact, Elite,
2 Heavy Cavalry
4 Galloglaich, Heavy Swordsmen, 2HW, Elite
4 Billmen, Heavy Swordsmen, 2HW
4 Kerns, Light Infantry, Javelin
2 Light Cavalry, Light Cavalry, Javelin
4 Longbowmen, 2 elite
Breakpoint of 22
The Board:
The Anglo Irish win the initiative and elect to defend in the plains.
However, all the terrain fell on the Samurai side of the board.
 |
| Near the Shannon River, the central plain of Ireland gently undulates. |
And by an amazing coincidence, the author lives in Limerick township.
 |
| The Anglo Irish Army deploys on the rivers edge, one flank secure with a steady supply of water. |
 |
| The Japanese center command of 5 Samurai, and 2 Yari |
 |
| Their right side command is 6 Heavy Cavalry, Bow. |
A note about the sudden change in color from green to brown. The camera's flash was set to "auto". So that the left side of the field had insufficient light, so the flash went off, giving the field the correct coloration of green. The right side of the field was judged sufficient light from the overhead lighting, but is a brown coloration found in florescent bulbs. The overhead lights are 4 tubes of 5,000 kelvin LED's, but also one huge curly LED rated at 300w, but probably 2,700 kelvin, which dominated the color scheme. I didn't realize what was happening till half way through the game. Sorry.
For more on LED Lighting and an explanation on Kelvins, I wrote
this article many years ago.
Turn 1:
 |
| Out of the gully pours out a large command of spear and bow. |
 |
| The Samurai advance 1UD, and slide right. |
 |
| The horse Samurai advance at a trot. |
 |
| The Irish Light Horse advance and harass from behind the left flank of the Japanese army. |
 |
| The main battle line of the Anglo-Irish advances one march. |
 |
| It is along the River Shannon that the first attack of the Anglo-Irish will fall. Heavy Knights supported by Heavy Cavalry and Longbow. |
Turn 2:
 |
| Darryl-san rolled very well with command points. He charges the Light Horse with a Samurai unit. The Light Horse stood to receive, so Darryl-san then brought up a Yari to support. But the luck was with the Irish as the Samurai took the hit. |
 |
| The main line of Samurai advance to bow range and loose arrows. |
 |
| The same with the Samurai horse. |
 |
| The Irish Light Horse have done their best, breaking up the ranks of a the Samurai left command, and so break off. Samurai loose a volley at their retreating horses. |
 |
| The Irish battle line holds and rallies. |
 |
| While the knights run off their tormentors. |
Turn 3:
 |
| Another volley, and the Irish Lights are dispersed to the winds. |
After which, the Samurai rally, and then break out the Saki to celebrate their victory.
 |
| A couple of units of spear and bow flank the Anglo-Irish line. |
 |
| Their Samurai continue to expend sheaf after sheaf of arrows. |
The Shogun is not paying them to bring them back.
 |
| Samurai horse advance again and shoot. A Yari takes up position to flank chargers if the Anglo-Irish charge again. |
 |
| The Galloglaich advance and commit to battle. The Billmen hang behind. |
 |
| The Anglo-Irish horse successfully rally their losses. |
Turn 4:
 |
| Darryl-san orders a charge. It's elite longbow vs mediocre spear. The spear roll poorly and take a hit. |
 |
| The Galloglaich have left their screen of Kerns behind and now are experiencing the accuracy of Japanese shooting. |
 |
| The horse archery is proving useless against the Knights armor. |
 |
| Galloglaich charge. A Yari is plowed under. |
 |
| Fortune favors the bold, as Yari and Samurai begin to buckle under the bloody axes of the Galloglaich. The Anglo Billmen take up position for the next charge. |
 |
| The horns blow, signaling another charge. Samurai horses tire and roll short on the evade. Knight stallions give chase! |
Turn 5:
 |
| The Longbow holding the flank is charged again, and collapses. Mediocre Japanese archers take up position against the flanked Galloglaich. But dare not approach any closer as they saw what happened to the the last Yari, who had spears and shields! |
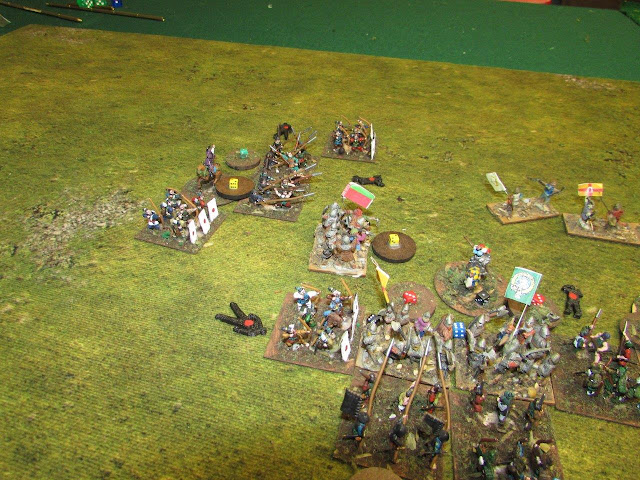
 |
| The Samurai line continues to hold, but the Galloglaich are close to breaking through. |
 |
| Samurai horsemen are out of room to retreat, and draw their swords. |
 |
| A lot of maneuvering, but not a lot of casualties. The score is 6-5. |
 |
| The Billmen join the fight. But too late for the Galloglaich Clan O'Lyre as it is destroyed. |
 |
| Another massive charge. An Irish Noble is in trouble. |
 |
| But the commander's knights blithely dismiss their opponents. |
 |
| His brother knights and Irish Nobles also hack and slay. |
 |
| And just like that, the score is now 12 all. |
Turn 6:
 |
| The Longbow acting as flank guard is giving way. |
 |
| The Boys from Stafford are now flanked but hold their ground. Clan Ramsay is fighting hard, but giving ground. The Billmens charge falters against some of the Samurai, but destroys another. |
 |
| Chaos erupts in the cavalry fight as the superior numbers of the Samurai make themselves felt. The Anglo General is flanked and killed. |
 |
| The game is still nearly even, 15-14 |
 |
| At the bottom of the turn, almost nothing as changed. |
 |
| The center scrum is a pretty even exchange. |
 |
| The brother knights, outnumbered, but also with better armor and elite, stand their ground. And give better then they got, causing 2 hits on their attackers. |
 |
| The score is now 17-All! |
Turn 7:
Both sides are now within 5 of demoralization.
 |
| Both Clan Ramsay the Boys from Stafford are destroyed. The last Galloglaich stands, but is in very poor shape from archery fire. |
 |
| A Billmen is defeated, but that is matched by a Yari being dispersed. |
 |
| The cavalry fight continues. The Japanese have a 3-2 edge in numbers, and still have their commander. |
 |
| The final tally at the Tree of Woe, 22-17 |
|
So what went wrong with the Anglo-Irish? Their main battle line was turned and crumbled, just as their best troops were engaged frontally with weaker opponents. The Irish had a 22 to 21 advantage in units, but the Japanese have no light troops. One of the Irish Light Horse peeled off two units that never saw combat again, so in the end the main battle lines the Japanese had the advantage of 19 - 16.
But the main problem, worked out afterwards was that Tommy was working with an extreme disadvantage with the views presented by the camera. I needed to be more proactive in moving it about so that is views were optimal.


Sounds like a heck of a game. I really do have to check out AdlG
ReplyDeleteWhy yes, yes you do. I have other battle reports on this blog. Just click on the year and month to the right for more.
ReplyDeleteAs always a very entertaining game.
ReplyDelete