A Headless Body Production
Venue: Fredericksburg Expo & Conference Center
Event: Historicon's L'Art de la Guerre's Medieval Tournament, Round 1,
Players: Phil Gardocki running Anglo Irish
Dan Hazelback, running Normans in Italy.
Game System: L'Art de la Guerre, 200 points per side.
Theme: Medieval. No Heavy Knights, No Foot Knights, No Elephants.
The Forces:
Anglo Irish: Commanders Larry, Darryl and Darryl, all barely competent.
4 Galloglaich, Heavy Swordsmen, 2HW (elite)
2 English Longbowmen (elite)
2 Medium Knights, Impact (elite)
4 Longbowmen
2 Irish Nobles, Heavy Cavalry
2 Light Cavalry, Javelin
2 Kerns, Light Infantry, Javelin
2 Irish Foot, Javelinmen, Javelin
Breakpoint...21
Frederick II (a Strategist) leading the Normans in Sicily.
3 German Knights, Medium Knight, Impact
4 Feudal Knights, Medium Knight, Impetuous
6 Berbers and Saracen Auxiliaries, Light Cavalry Javelin
4 Mixed Foot, ½ Heavy spearmen ½ Crossbowmen
3 Spearmen, Heavy spearmen
4 Saracen Light Archers Light infantry bow
Breakpoint...24
The Board:
This is the first game of the Medieval Tourney at Historicon. By machination or just luck of the draw, I drew the tournament organizer. So who do you call with a rules question when you are against the judge?
The
Anglo-Irish win the toss and elect to defend in the mountains. Not
that the mountains are overly favorable terrain, but it was a change of
pace from the plains, and I get to repurpose my son's 4th grade project on some mountain
in Honduras as an impassible.
After all the terrain rolls, the "impassible" and the gully wound up on the Normans right flank while
the Anglo-Irish had two hills and a woods on their side.
Deployment:
The Normans deployed all their knights in a line, flanked by spearmen. Lights were scattered about to the front and on the flanks. Frederick II commands the position of honor on the right with 11 units. The smaller Battles of 7 units of Knights and Saracen's in the center, while a Battle of 6 foot defends the left.
The Anglo-Irish went turtle barricading both flanks with fortifications. Ambushes were placed in both woods and behind the hill. The command structure is 6 on each flank, 1 unit each of Irish Nobles, Knights, Irish Light Horse, Longbow, Javelinmen and Kerns. The center is held by 4 Galloglaich and 4 Longbow.
Turn 1:
 |
| Looks pretty impassible to me. |
 |
| The overall Norman deployment. Knights in the center, Spear on the flanks. Well supported with lights. |
 |
| Closer view of the Norman right. I love the tent camp. |
 |
| And the Norman left. |
 |
| The Irish right. The actual board is in the lines. At the barricades are a Longbow and a Javelinmen. Between them is an Anglo Knight and a Irish Noble. The skirmishers are set to run out and slow down the spear units. But outnumbered 2.5 to 1, I don't think they will accomplish that mission. |
 |
| In the center is a fortified camp. Really? With each stone weighing 25 tons, what are the enemy going to do? Graffiti? In ambush are 4 Galloglaichs (HI, 2HW, Elite). On their flanks are 4 Longbow, the red ones are elite as well. |
 |
| On the Left and in the woods are another Knight and Noble. I expect to be able to get out of the woods before the Normans get close. In ambush are LI, Javelinmen and a Longbow. |
Turn 1:
 |
| The heavy fog lifts in the moor, to reveal the Normans advancing quickly across the field. Also revealed by the ascending mist was that great hill to defend was nothing more than a farmers manure pile. (There was a misunderstanding and rather than start over, we just lifted the hill) |
|
 |
| The Irish line looks strong. |
 |
| The Ambush is revealed as Longbow and Javelinmen man the barricades. |
 |
| Longbow shoot for a hit. |
 |
| And again. |
Turn 2:
 |
| The Norman Crossbowmen get their licks in. |
 |
| While on the Irish left, the Norman lights flank the barricades. |
 |
| The Normans have a lot of command points but not enough to get their lights out of the way. |
 |
| Trading shots on the left. |
 |
| And a pair of evades on the right. |
Turn 3:
 |
| A unit of Kerns is shot away. And the longbow also takes a hit. |
 |
| At this point the Normans are realizing how many points are already on the board and decide to pull back damaged lights instead of moving forward. |
 |
| They pull back a LI here as well. |
 |
| In all of history there has never been a conclusive battle to determine which was better, Longbow or Crossbow. (Except at Crecy, but rain interfered) Here Longbow have taken 2 to the Crossbows 1. |
 |
| An attempt at rally fails. |
 |
| The longbow rally, and shoot down a light horse. |
Turn 4:
At this point, both sides are content with a shooting contest. A contest where individual Longbow have the advantage, but the Normans have 14 shooting platforms. Admittedly, most are lights. At this point each side has one unit killed and two damaged.
 |
| The Norman right flank gets a few command points and push forward. Their missiles damage both a Knight and a Longbow, but their Berber LC also takes a hit. |
 |
| Both Normans and Irish are content to shoot and rally. Though the Norman Knights pull closer. A Saracen Light Cavalry is shot down. |
 |
| The Irish Light Horse rallies, but the Knights take a hit. |
 |
| The view from center. From left to right, Clan O'Lyre, Clan Ramsay, Clan Jordan and the boyo's from Ulster. |
 |
| The Longbow reach out and touch a Norman Knight. |
 |
| On the Irish left, there is no room to evade, so charge! The evading Berbers are caught and destroyed! |
 |
| And pursue! |
Turn 5:
 |
| The Norman Knights charge the Longbow, and pick them both up. |
 |
| And on the Irish right, two more Longbow fall. |
 |
| + 1 Javelin against -1 cohesion. And the last Berber wins. |
 |
| The grand melee starts. The Knights and Javelinmen win, but the Nobles lose. |
 |
| Clan Ramsay, far left is taking a beating. The Boys from Ulster are winning their fight. |
 |
| On the far right, the Nobles and Knights chase off the skirmishers. |
 |
| Other views of the scrum. The Boys from Ulster, supported by Clan Jordan and Larry win the fight, but just barely. I think we both rolled 6's with the final result 10-8. |
 |
| Clan O'Lyre is winning their fight, but Clan Ramsay is in danger of collapsing. |
Turn 6:
It is the beginning of the end as the Normans have several internal flanks to exploit. Some good die rolls prevented this from becoming a disaster. But truth be told I am only playing for points now.
 |
| It is the beginning of the end as the Normans have several internal flanks to exploit. |
 |
| The Boys from Ulster are flanked as well. |
 |
| Clan Ramsay is scattered, but so is a Norman Knight. |
 |
| The Boys from Ulster hold their line. |
 |
| The Irish left is creaking badly. |
 |
| At this point the Irish breakpoint (21) was reached. The Normans were at 15 points. All in all a good fight. |
So what went wrong here. Part of the problem was the terrain. I picked mountains, and didn't realize all the hills must be steep. I deployed a "gentle" hill in the center and based my strategy on that foundation. We went back and forth on a method to rectify this, Dan actually offered to keep the gentile. As the offending party I refused and opted to remove the thing entirely.
But the other part of the problem with terrain, is my spacial relations is poor. What I eyeball will fit is often woefully inaccurate. So my army is compressed into ineffectiveness.
The second, and probably more important problem is the use of my lights. In general, my opponents are out spending me in lights. In this case 52 to 20. So I am not going to win the lights battle. Which means there is no chance of my lights running out there and delaying an enemy force. It is doing all it can just to stay alive. This also gives my opponents better opportunities to shape the line of impact favorably.


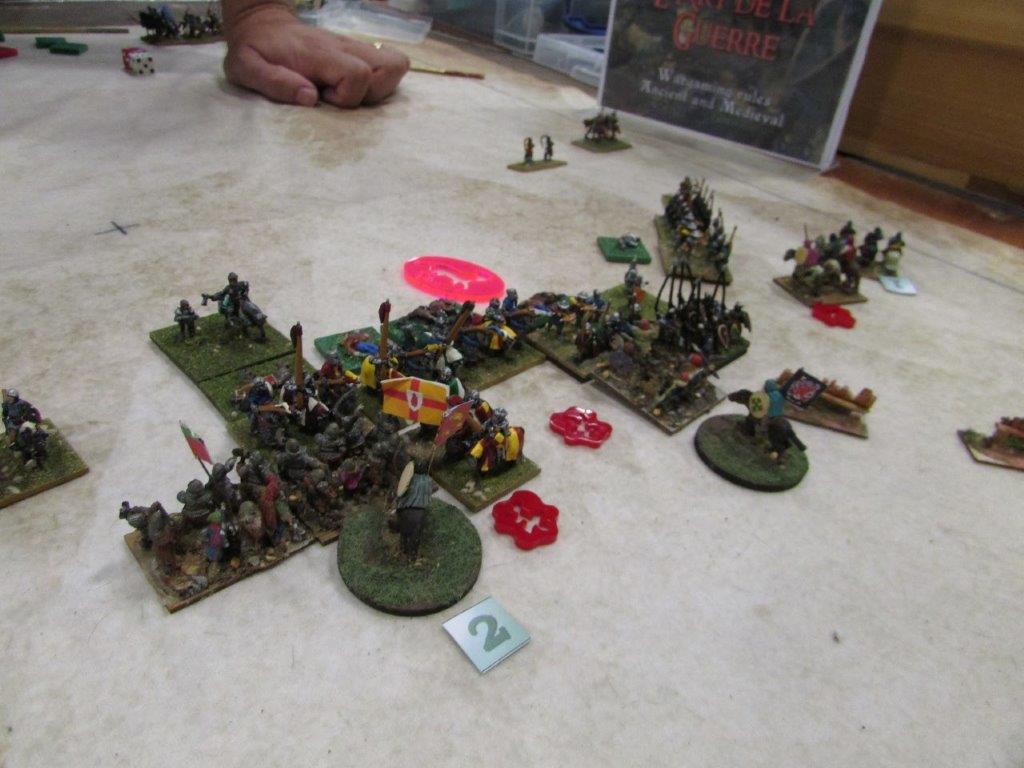


What are the tokens?
ReplyDeleteThey represent dead units. Men and cavalry. The men are referred to as "People Pizzas" and are available through Litko Systems. The horses and elephants I had custom made. They have no game value except to intimidate the losing player. Nothing like graphic representation on your losses. But they are vital for the maintaining the narrative of the battle report. Otherwise you get text of things destroyed and only minimal references as to where it was, and who killed it.
ReplyDelete