A Headless Body Production
Venue: Sean Gregory's Livingroom, Phillipsburg, NJ
Event: Saturday Afternoon
Players: Sean Gregory playing Seleucid
Phil Gardocki playing Parthia
Game System: L'Art de la Guerre, about 200 points per side.
The Scenario: A historically possible match up between Parthia and the Seleucid Empire. My understanding however is that the Seleucid's did not have Cataphracts as we think of them at this time. But the lists do not offer an option for an earlier Armored Heavy Cavalry.
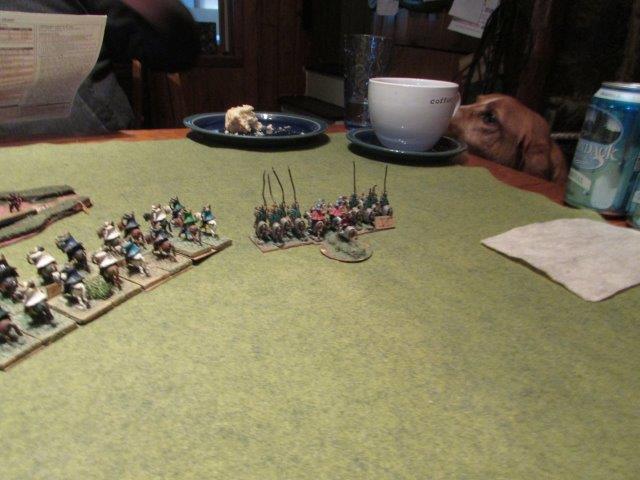
The Forces:
Antiochus III is canny and despite the primacy of Parthian Light Horse as scouts, an accurate count of his forces remains unknown. Pike, Cataphracts, Scythed Chariots
Parthia: Commanders Xerxes, may is lips rot off, Thou whoreson mandrake, Darryl and Darryl, an ugly and venomous toad.
8 Cataphracts (2 elite)
16 Militia, Light Horse, Bow
Breakpoint 24
The Board:
Antiochus III lost the initiative roll, and will defend in the plains. The board has a gentle hill, two fields, a plantation and a gully. Most of this unimaginatively reproduced terrain is on the Seleucid side of the board.
 |
| On the Parthian left, on the Seleucid side of the board, is a field (beige), a plantation (green), a hill and a gully. |
 |
| Xerxes, mounted unwisely on a camel, takes the center with his command of 2 elite Cataphracts. |
 |
| On the right is the other field. His brother Darryl leads a command of 3 Cataphracts and 8 Light Horse. |
 |
| On the left, his other brother Darryl has another command of 3 Cataphracts and 8 Light Horse. |
 |
| Antiochus III has a command consisting of 5 Taxis of Pike, 2 units of Cataphracts. They are in a good position to defend with a gully to their front, and a Heavy Catapult on the hill to their right. |
 |
| On their right, defending their camp, two Agema of Heavy Cavalry and two more Taxis of Pike, possibly Argyraspides. |
 |
| On their left, 3 units of Light Infantry, and a Scythed Chariot. |
Two commands revealed, there seems to be a flank march running, or there is a small command in ambush.
There is a lot of maneuvering going on with this game. Involving Pike and Cataphract which have as a trait, unmaneuverable. If you want to cut to the push and shove, skip on down to
Turn 9.
Turn 1:
 |
| The Parthian Light Horse invest the field, approaching the ambush marker, but not getting close enough to reveal it. |
 |
| On the right, Parthian Militia double time it to approach the Gully. |
 |
| Xerxes's Cataphracts advance slowly. The plan is to shoot lots before engaging. |
 |
| Darryl advances one and slides right. It was a gross error on deployment to set up behind the plantation. |
 |
| Darryl advances with a bit more alacrity, he would have double timed the Cataphracts, but didn't have the command points to do so. |
 |
| Antiochus III has no intentions of being caught like a badger in a trap and comes out of his hole to face the peril. |
 |
| The charioteer follows the line of pike. |
 |
| The Argyraspides command also advances. |
Turn 2:
This is all very interesting. The Seleucid's are not going to whole up and are definitely coming out to play.
 |
| A mistake has been made. The Seleucid ambush marker was full of LMI. But LMI cannot hide in a field, so we deployed them in the rear of the Seleucid right command. Darryl's Light horse begins to compress for some shooting. |
 |
| 8 Light Horse Bow should be able to shoot up 3 Light Infantry fairly quickly. |
 |
| Xerxes doesn't like the looks of the concerted line of pike, and decides for an on board flank march instead. |
|
|
 |
| Following his brother Darryl, that has the same idea. |
 |
| The Parthian Militia are losing the exchange of missile fire. |
 |
| But manage to ding two Argyraspides. |
 |
| First kill to the Seleucid's |
 |
| The Pike charge off the Militia. |
Turn 3.
Despite losing a Light Horse, this is working out OK. Shooting up a line is a long term proposition, and I have the time. By charging forward, the Pike are opening up their rear. Sure they can turn around to face the Cataphracts heading that way, but then they can be charged by my light horse.
 |
| Parthian Cataphracts turn the corner of the gully, but the shooting isn't working. |
 |
| The Argyraspides rally one, but not the other. But that holds up their line and presents other targets to shoot at. |
 |
| The Militia Cavalry continue to take hits, while the Light Infantry rally theirs off. |
 |
| The Pike charge 4 Taxis, leaving one to cover their flank. |
 |
| Darryl is patiently waiting for his turn. |
Turn 4:
 |
| The Militia split up, and turn the flank of the Light Infantry. |
 |
| On the left, the Parthians turn, their ultimate goal now is the left hand corner of the Pike block. |
 |
| The Light Horse continue to harass, but not harm. |
 |
| The Seleucid's have a better eye for time and distance. It will take at least 4 turns for the Cataphracts to turn that flank. And so they can be ignored for now. |
Time goes by....
There is a lot of the same o, same o here. We'll just cut out some of the boring bits.
Turn 8:
 |
| Due to a lack of command points, or a lack of focus, the on board flank march of Cataphracts has stalled. Meanwhile, even though surrounded the Light Foot in the gully continue to hold, and even win. |
 |
| While on the Parthian left, not much has happened either. |
 |
| Xerxes, with his 2 Cataphract command, has changed his mind (again), and is deploying back to the center. |
 |
| Those guys in the gully are spunky. |
 |
| All that maneuvering for advantage, and it is still going to be head to head, with no preparation fire. Why do I even bother? |
 |
| All that bow, and nothing. |
 |
| A Cataphract has been dinged by Light Infantry. |
Turn 9:
 |
| Hoping for an early advantage, 3 Cataphracts charge 2 Pike. The first set of die rolls do not bode well and a Cataphract is destroyed on contact. |
 |
| The second set of dice is a tie. |
 |
| And, after 9 turns, a Light Infantry unit is finally destroyed. |
 |
| Xerxes charges his two Cataphracts as well. He wins one, and loses one. The Seleucid's commit their Scythed Chariot against a Milita Light Horse. |
 |
| The Parthians pull a win on the following round against the pike, and also on the Seleucid horse as well. |
 |
| Parthian Light Horse evade, and roll short, just avoiding leaving the board. |
Turn 10:
 |
| Both Antiochus III and Xerxes are all in in the center fight. A light horse is destroyed by the Chariot, and a Parthian Cataphract wracks up another hit. |
 |
| In anticipation of the other brother Darryl ever moving, Antiochus III has his Argyraspides and Agema waiting. |
 |
| On the hill, there is a single Parthian Militia Light Horse
harassing the Heavy Catapult. This will go on till the rest of the game
as it fails to score any hits with it's bow. |
 |
| Light Horse tag the LMI in the open. A temptation to charge, but I don't have the command points for it. |
 |
| Both Parthian Cataphracts and Seleucid Agema are destroyed. |
Turn 12:
 |
| A pike unit is destroyed, and an Agema further damaged. But Antiochus III is not concerned with his line. The Parthian Cataphracts are separated while Antiochus has pike filling the holes. |
 |
| Cataphracts are flanked and reared. And even if they should win, there are more pike standing by. |
 |
| You know your opponent is having a good day when his Scythed Chariot is still around on turn 12, and has run out of targets to charge. |
 |
| Light horse evading in front of the camp. |
 |
| Darryl enters the fray, supporting one of his two remaining Cataphracts. |
 |
| Last turn, and the Militia on the hill charges the Heavy Catapult, and scores a hit. |
This game was quite a chess match. The Parthians did their best to avoid a straight up match against pike and failed, with predictable results afterwards. The only surprise was one pike was actually destroyed. 3 Cataphracts were never a factor as one took a hit around turn 8, and failed every 3+ rally attempt afterwards. That flank also spent a considerable number of command points trying to clear the gully of Light Infantry, and failed miserably.
The end score was 23 to 9 in favor of the Seleucids.


Why not straighten the spears ?
ReplyDeleteSome of these figures are more then 30 years old. The more you straighten them, the faster the metal fatigue breaks them off.
ReplyDeleteUnderstand, but it does detract from otherwise fine game fotos.
ReplyDeleteI fully understand as a person who has many 30 year old figures. Many of those are SAE#'s with soft lead muskets and the point about metal fatigue is quite right. For my Surens and Staddens I use music wire spears and I don't dull the edges so manhandle at your own risk But I also put them in HUGE stands (36 on a 4" by 8" stand with the base overlapping the footprint of the unit which limits the damage that the "Gamer Cluw" can do.
ReplyDeleteotto