A Headless Body Production
Location: Dave's House
Event: Saturday Winter Follies
Players: Robert Nedwich, playing Cilician Armenians
Phil Gardocki, playing the Swiss, circa 1400AD.
Game System: L'Art de la Guerre, 200 points per side.
Scenario: The Cilician Armenians have been on a rampage, heading west looking for conquest and loot. Seeing a chance to solve two problems, an invading army and a province in revolt, the Hapsburgs provided a few guides, had a few road signs changed, and directed the horde to the Swiss Alps. The Swiss Confederacy, thinking this was another attempt of the Hapsburgs to reign them back into the empire, which was true, called out the muster of the cantons Zürich, Bern and Luzern to repel the intruders.
The Forces:
The Swiss were running with two Brilliant and one Competent commanders. Their forces consisted of 15 Halberdiers (Medium 2 Handed Swordsmen), 4 Light Infantry Crossbow, 2 Light Horse Crossbow, 3 palisades and a fortified camp.
The Cilician Armenians commanders were one Brilliant, one Competent and one Ordinary. Their forces consisted of 8 Medium Knights (a mix of impetuous and impact, mostly Elite), 4 Light Medium Bow, 2 Heavy Infantry Spear, 2 Light Foot Bow, 4 Medium Spear, 2 Light Horse (impact) and a fortified camp.
Deployment:
The Swiss win the toss and elect to receive! They select 3 steep hills and an impassible lake. The Knights opt to stay on their road, even though they now suspect it is not leading to Budapest like the signs say.
 |
| The Swiss left flank is anchored to a lake. Their two weaker commands are on the right flank. The Armenians are running a flank march. |
 |
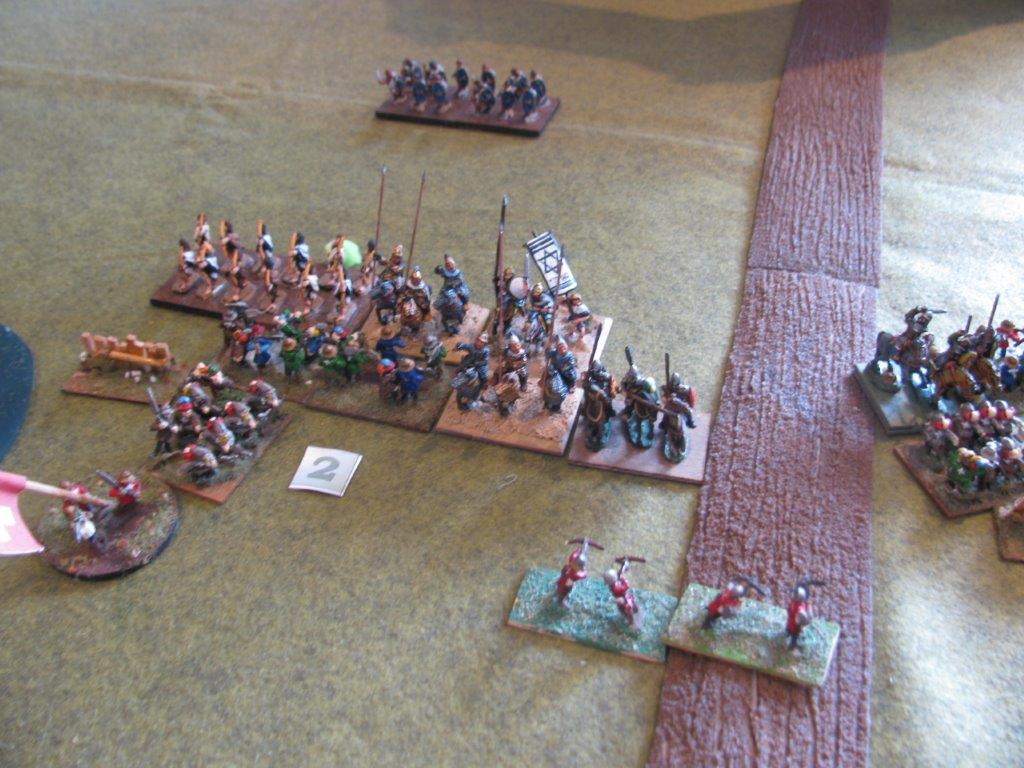
| Swiss right flank. Visible are 6 Halberdier units and 2 Light Horse. In ambush are 2 LI CB, and another Halberdier. |
Turns 1 and 2
The Swiss decide not to meet the invaders. Let them come! The Armenian flank march fails to bolster the Armenian left flank so they are looking a little thin there. The Swiss LI in ambush are revealed and start playing skirmisher games.
 |
| The lines approach. The LI CB hopes to ding a knight before fleeing to the main line. |
 |
| The Swiss Skirmishers degrade rapidly facing the shooting power of real bowmen. But the Halberdiers have the steep hill and are not likely to yield it. |
 |
| I have to get a tripod. This is the best of 3 pictures. |
Turn 3:
The main battle lines begin to engage as the knights charge one of the smaller Swiss commands. Matching the halberdiers element to element. This is the worse lineup the halberdiers have to face as they lose their +1 combat advantage against knights. The knights also have "Impact" to amplify their effects. But all is not lost as the Swiss have some staying power due to their Elite status.
 |
| The shock of impact. The Armenians commit their general to fighting in the front line. |
 |
| The end result is pretty much a wash. One halberdier unit takes two hits, but a knight also takes a cohesion hit. |
 |
| The Armenian bowmen retreat before the Halberdiers on the hill. |
 |
| The LI CB take another hit. |
 |
| The Swiss rally one of the halberdiers, and add two more halberdiers to the scrum. Two knights have cohesion hits while the whole Swiss line is damaged. |
 |
| The main battle lines are about to engage. |
Turn 4:
The Armenian flank march failed to arrive. The Armenians have tested the meddle of the Swiss and found them wanting. The knights have an inherent advantage of +1 in general melee. With that, the knights do not wait for their infantry support and commit themselves to combat.
 |
| The knights have +1 and impact on contact, but the Swiss have elite and a flank. Largely the die rolls ran for the Swiss and the neither line took many hits. |
 |
| And things went very bad for the Armenian left side strike force. They rallied their center knight, but another was routed. |
 |
| Followed rapidly by their Light Horse supports, and then another another knight, and their general! |
 |
| But luck runs both ways, as in the center the Swiss lose two halberdiers, while two others are almost spent with two hits apiece! |
 |
| Well, at least the LI CB have something to shoot at. |
Turn 5:
The Armenian flank march fails to arrive. The Armenian left flank doesn't have many actions as their General died in a rout. But one Swiss command is heavily damaged and is effectively combat ineffective, while their command is two dead, and two walking dead. The Swiss are teetering at the brink, and just need one more shove to get to the 22 point army break point.
 |
| The Armenians have forces on their left, but having no commander pretty much limits their actions to 1 thing. So the spear unit gets pushed forward, while the bow units are facing the wrong way. |
 |
| The Armenians commit their only general to the front to good effect as the Swiss lose another halberdier unit. But the Armenians also commit their bow unit to hand to hand combat, and take a hit. |
 |
| The Swiss commander attempts to rally one of his few remaining units, but is ignored. |
 |
| Poor picture here, but important. The center Swiss command is successful in both rallying and peeling off units to support the other commands. The Swiss command on the hill comes off the hill to attack the Armenian Spear Infantry. |
Turn 6:
The Armenian flank march fails to arrive. The Swiss center command, having totally routed their foes are sending units left and right to support their other commands to good effect.
 |
| On the Swiss right, the Armenians have the numbers, but not the quality. As 2 handed weapons have an advantage over spears, and the bow units just are lousy in hand to hand. That and the Swiss elite status giving an extra +1 when the dice are bad comes into effect again and again. |
 |
| The Swiss main command has lost 6 out of 8 of their halberdiers, but still resists being totally destroyed. |
Turn 7:
The Armenian flank march fails to arrive. The turns are moving fast here.
 |
| What? There are more of them? An ambush is revealed! |
 |
| Even in defeat, the Swiss fight on, routing the bow unit through a freshly arriving blade unit. |
 |
| Both the Armenians and the Swiss lose a unit here. |
 |
| The knights continue to apply pressure to the Swiss line. |
 |
| But the final blow falls in a dramatic fashion. The last two halberdiers of the Swiss main command, manage to attack the flank of a flanking knight, destroying it and taking the Armenians over their break point first! The Swiss win 20-18. |