A Headless Body Production
Venue: Fredericksburg Expo & Conference Center
Event: Historicon's L'Art de la Guerre's Open Tournament, Round 1,
Players: Phil Gardocki running Porus and Son
Steve Baier, running Carthaginian.
Game System: L'Art de la Guerre, 200 points per side.
Historicon! The Mecca of miniature wargamers in the USA. 3,000+ gamers descend upon historic Fredricksburg for 3 days of Martians, Mammoths and Mayhem. Highlighted was the soon to be released Sergeants, Hell on Wheels by Lost Battalion, a massive walk-up game of raiders vs a Gallic migration. The table was 32 feet long with thousands of figures. All's Quiet on the Martian Front was represented by a huge field of 30 Tripods verses a hundred plus Steam Tanks. The WWPD crew were in evidence with a live podcast. And of course, Ancients. Three Ancients systems were running strong, "Triumph! Fast Play Rules" seems to be a new comer with a good following. Warrior, which was having a resurgence, and L'Art de la Guerre.
The Forces:
Classic Indians: Commanders Porus, Porus (no joke!) and Patel
Represented by elephants with howdah's and the white tiger
skinned chariot.
4 Elephants (elite)
3 Heavy Chariots, Impetuous (elite)
2 Medium Cavalry (mediocre)
2 Medium Swordsmen (elite)
6 Mixed Sword (mediocre)/Bowmen (ordinary)
2 Light Foot Bow
Break point....19
Apologies
for the lack of flocking on the Indian troops. I decided to re-base
that morning to more appropriate Medium Infantry basing.
Carthaginian:
As Roman spies are everywhere, Hannibal the strategist refuses to provide list.
Breakpoint...22
The Board:
The Indians lose the initiative roll and are defending in the plains. They take the required field, a gully, a plantation and a gentle hill. The Carthaginians take 2 fields. The layout is a gully in front of the Indian center, and both the plantation and field on the Indian left.
I have played enough of these games to question a few things with the game setup. Having lost far more initiative rolls then I win, which is expected as my armies have weak generals and not much in the way of Light Cavalry. My opponents almost always pick attacker and plains. They also always pick the minimum number of terrain picks, in order to get the maximum number of terrain movement rolls. I always go for 3 terrain picks and 1 terrain move roll.
I am clearly in the minority on the decisions of this process. But I think my reasoning is sound. Defense sets up first, but with two ambushes up to 7 IU's into the board, almost half my army is not view-able on deployment. I regard that as an advantage.
With regard to amount of terrain, pick 3 with 1 terrain move to me is an advantage over pick 2 and 2 terrain moves. Any piece of terrain has a 50/50 chance of being on my side of the board. Where as the movement roll has a 1/3 chance of failure, and you cannot move what is not there. I would be interested in hearing other people's thoughts on this.
Deployment:
The Indians have two Elephant commands and one Chariot command. One Elephant command is on the left, Chariots in the middle, and the remaining Elephant on the right. In ambush on the left is 3 LMI, with bows. On the right in ambush is a single Light Infantry. Elephants cannot be put in ambush in a gully, and there is no advantage to having my bow troops in there as well.
 |
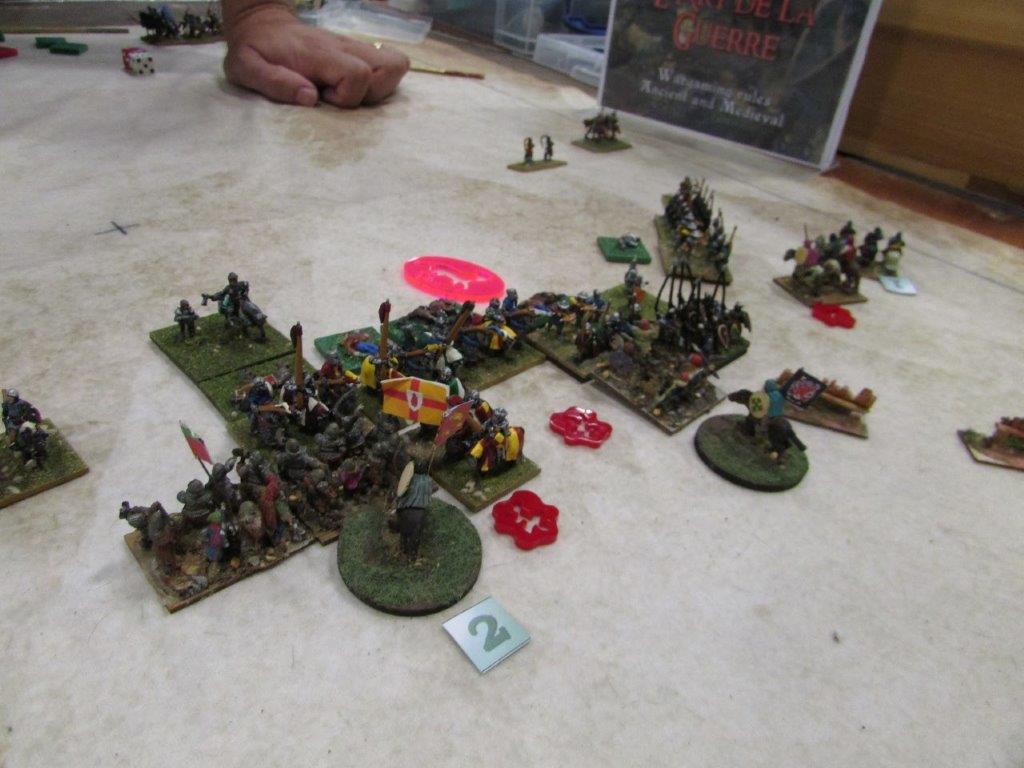
| The Indian left command with 2 Elephants supported by an elite unit of Guards. In ambush in the plantation are 3 units of Bow. The center command is 3 Heavy Chariots and 2 Medium Cavalry. |
 |
| The Indian right is 2 Elephants supported 3 units of Bow, and an elite unit of Guards. The plan is to draw the Carthaginians close to the gully, and take up positions behind it. |
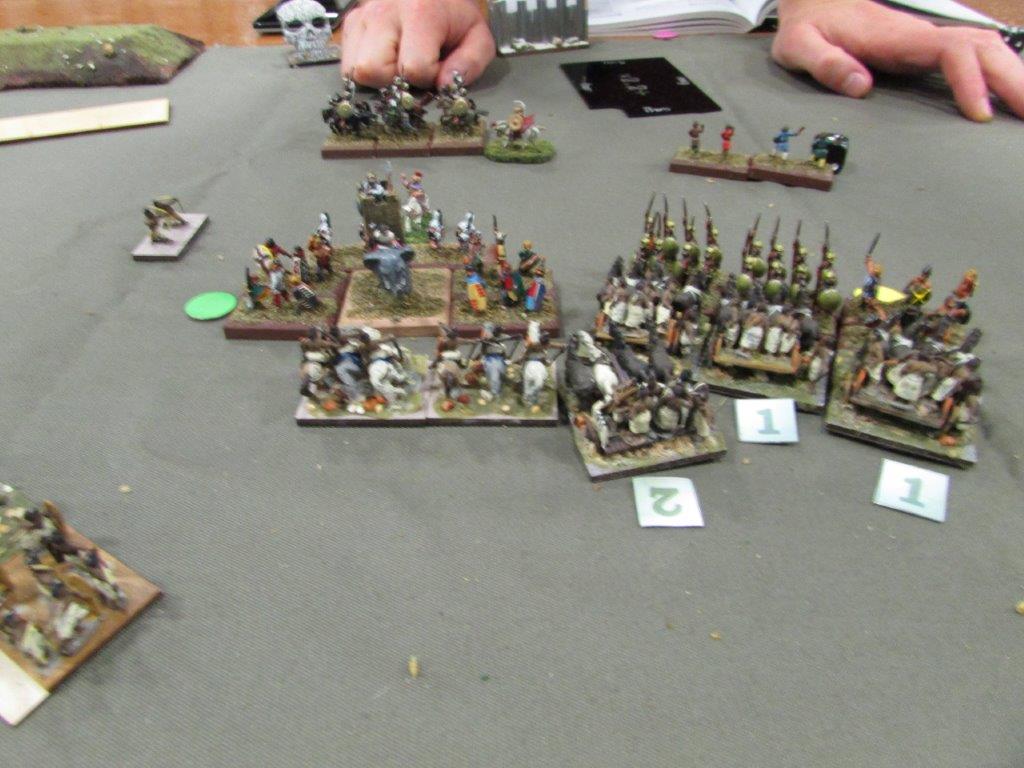
The Carthaginians have a small command of foot and a single mediocre elephant on their right. A strong spear command supported by cavalry in their center, and more spear supported by Light Cavalry on their left. They are well supplied with skirmishers.
Turn 1:
Hannibal personally leads the left flank attack at what he perceives as his strong side.
 |
| Hannibal with the red banner. The Light Cavalry hopes to turn the flank, but is still stopped at 4 IU's by the ambush marker. |
 |
| The Carthaginian right and center commands seem to want to gang up on the Indian Chariot Command. |
 |
| Prince Porus's Chariots accept the challenge. |
 |
| On the left, King Porus gets 4 command points. He advances his elephants, and reveals his ambush, pulling 3 Mixed Sword/Bow units out of the plantation and double moves them to a flanking position on the Carthaginian right. |
Turn 2:
All is looking well so far. Flanking the Carthaginian right with 3 bow units seems like a great idea. I might even engineer some elephant on elephant action, with my elites vs the Carthaginian mediocre.
 |
| Predictably, the Nubian Light Cavalry takes up a flank position. |
 |
| The Chariots take a missile ding from the slingers. |
 |
| Always impetuous, Prince Porus charges in about a turn too soon. Losing 2 out of 3 fights. |
 |
| The Chariot flanks are covered, but with mediocre Medium Cavalry against elephants, that is not much. |
Turn 3:
 |
| Hannibal responds to the flank march with one of his own. Sending 3 Heavy Cavalry off to deal with the bowmen. His spear charge the Indian flank support, which evades off frame. |
 |
| Light on Light action as Carthaginian Javelin armed foot runs off Indian bow armed. |
Looking at this picture, I begin to see what is going wrong with my commanding of this army. I have noted it before with my Swiss Army, but in reverse. The Carthaginians, whose generals classifications are a Strategist, a Brilliant and a Competent, continuously have the extra command points for little things. My Light Infantry, which just ran off, is going to cost the same command point as it takes to bring the elephants into a charge, or save the bowmen from flank charges from Heavy Cavalry. In short, I will never have enough command points to finesse this army.
With Elephants, you think you don't need a lot of finesse, but if your opponent can distract you with enough side issues, that is an advantage. And paying 64 points for 4 Elephants, the Indian army is small and cannot afford the loss of 4 units. But neither can it afford to spend the command points to save them.
Another disadvantage of the Indians is the lack of adequate mobile troops. I am being taken out here by 3 Heavy Cavalry units, with not a lot of specials, simply because I lack the troops (cavalry) and the skill (command points) to deal with them.
 |
| The view from the Howdah. From Porus's point of view this looks good. |
 |
| I forgot I had brought the dead horse markers. One chariot is broken. |
 |
| King Porus charges his elephant, taking down a spear-man. The other Indian Medium Cavalry falls to the Carthaginian elephant. |
 |
| On the right. There have been bow action. The Indian bowmen enter the gully for a shot, which is NOT a good idea. But they scored on the Carthaginian cavalry. The Lights are run off, and just miss the edge of the board. It will take a number of command points to pull this flank back together, but it is points Hannibal have in abundance. |
Turn 4:
At this point I don't think things are too bad. My Chariots are taking a beating, but both the Carthaginian flank attacks are bogged down. This should allow for some Elephant action to turn things around.
 |
| The Carthaginian Heavy Cavalry takes a missile hit but only can charge Light Infantry. |
 |
| The Carthaginian Heavy Spear ignore the gully and march off. |
 |
| Once again abundant command points become a factor. Not only is one of Porus's elephants flanked, it is supported by an unmaneuverable elephant and Light Infantry Slingers. It is destroyed on contact. |
Turn 5:
 |
| The offer for a flank attack is too tempting. Indian Mixed Swordsmen/Bow charge from the gully. Despite flanks and support, they put on a poor showing. In the upper left, Prince Porus's chariots score a win, and have flanked a Spearman as well. |
 |
| All I can say is good shooting here. |
 |
| Two elephants down, and there is now elephant on elephant action. |
 |
| On the Indian left, the Carthaginian Heavy Cavalry have lost a unit. |
 |
| In a case of monkey see, monkey do, General Patel has swung his remaining elephant around to the right flank. When I think of the command cost to do this. 2 to turn, 3 to move. And for all that effort all I get is the cavalry scattering to the winds. |
 |
| The last of the chariots fall, and with it Prince Porus as well. King Porus hits his break point, 19 to the Carthaginian score of 14. Not a bad loss. |
So what went wrong here? The Indian army has to be played carefully. It does not have the agility of many of it's opponents. Either with quality cavalry or command points. When it's battlegroups fracture, it is a problem.
Nor do they have quality skirmishers. Hannibal had 8 elements of skirmishers which was used to good effect. On the right they distracted the flank, in the center opportune missile hits lead to melee advantages. They also distracted the Indian Bowman from inflicting hits on their spearmen. They paid a price though, contributing 5 points to the Carthaginian break-point total.
This sort of problem can be resolved with terrain, but that is not likely, as they have a low initiative roll. Fighting in the plains is pretty much what you can rely on to play with.
So keeping things tight, don't break off seems to be the way to go.